Philo
LEGO temperature sensor is both expensive and hard to find (the only reliable supplier I know is PleStore, who only delivers in USA!). I thus tried to build one fully compatible with the original temperature sensor, so that RCX is able to display temperature correctly.
Components choice
This kind of sensor is usually built with a special variety of resistor whose value decreases as temperature raises (NTC, negative temperature coefficient resistor). I now needed base value and temperature coefficient... a visit to Michael Gasperi's website told me that LEGO sensor resistance is 12 KOhm at 25°C. But, Michael points out, this value is not easily available, and probably the sensor is built using a 10 KOhm NTC series mounted with a fixed 2.2 KOhm resistor. He also suggests using a high temperature coefficient, in the 4000 K range.
So I bought two kinds of NTC thermistors, a BC-Components 2322-640-63103 and a Murata NTSA0XV103FE1B0. After adding to them a series 2.2 KOhm resistor, I charted temperature displayed by RCX versus actual temperature (measured with a thermocouple).
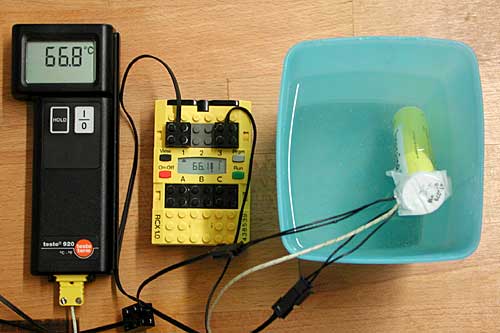
Good! within less than 1°C except near limits (the RCX displays temperature only from -20°C to 70°C), displayed temperature was correct...
RCX displayed temperature vs. actual temperature
I then found in Kekoa Proudfoot's document "RCX internals" the section of program code used by RCX to convert raw sensor value to temperature. I applied this algorithm to resistance values obtained from Murata and BC datasheets, and got a very good match.
Calculated RCX display vs. temperature
Theory and experiments thus confirm the choice of components...
Building
Remains to actually build the sensor, here is what I did (but of course other methods, perhaps simpler, can be used!)
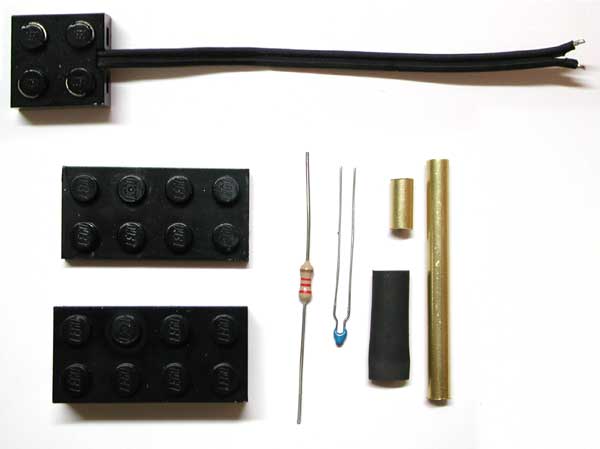
Needed stuff:
- 2 x 4 brick
- 2 x 4 plate
- 1/2 electric LEGO cable
- 10 KOhm NTC resistor, I used the smaller Murata one
- 2.2 KOhm resistor
- 2 pieces of 4mm diameter brass tube, one 1cm long, one 4cm long
- a piece of heat-shrink tube big enough to fit brass tube
- fine electric wire, solder, fine heat-shrink tube to insulate wires
- rapid-cure epoxy glue and cyanoacrylic glue
Tools:
- Power drill with stand
- 4 mm drill bit
- 8 mm milling cutter
- fine square file
- and of course solderig iron, cutters...
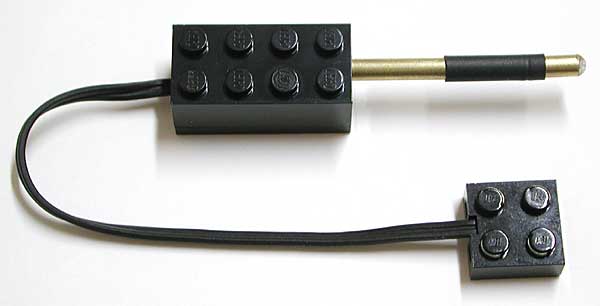
Assembly
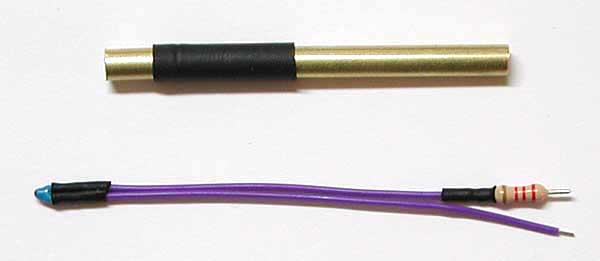
Fasten together both brass tubes with heat shrink tube, while leaving a 1 mm gap between pieces. Tip of the probe will be thermally separated from the rest of the sensor. Solder wires and 2.2 KOhm resistor to NTC resistor, insulate solders with fine heat shrink tube.

Insert the probe in the tube.
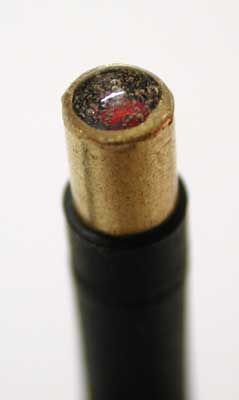
Seal the tube and fix the NTC with a drop of fast-cure epoxy glue.
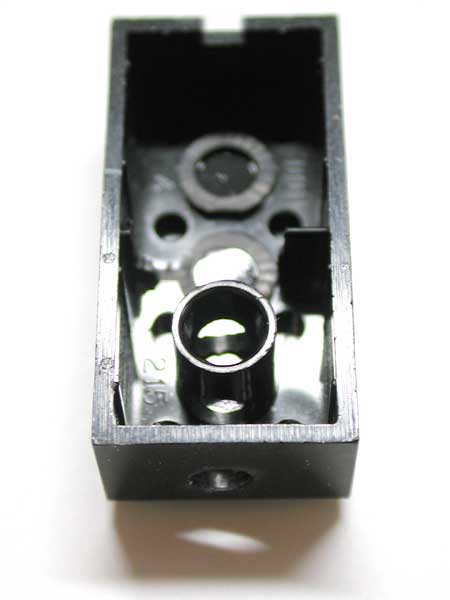
Using the milling cutter mounted on the power drill with stand, remove two out of three 2 x 4 brick internal tubes. TAKE CARE TO YOUR FINGERS!!!. Drill a 4 mm hole through the brick end and the remaining internal tube. Make a notch in brick back end using the file to allow cable output.
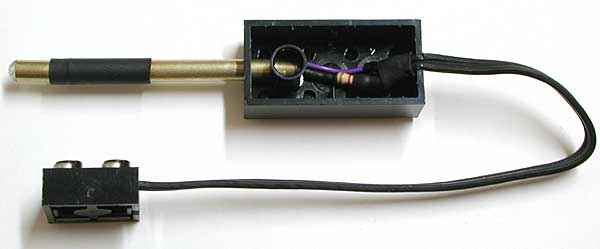
Insert the tube in brick hole, then solder LEGO electric cable. Glue the brass tube to the brick with cyanoacrylic glue.
Close the brick with the 2 x 4 plate (you can glue them together... but don't forget to verify that everything works fine before!)