alex [a] avtanski.com
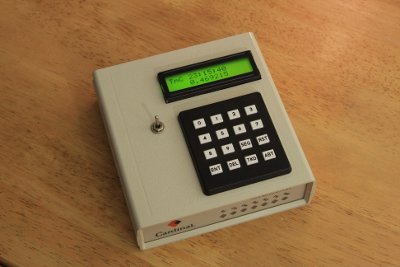
What do you do if you have a spare LCD module with backlight, a weird 16 button keyboard, and a PIC16F877A microcontroller gathering dust? A monster Martian Clock immediately springs to mind.
You are probably thinking "There are hundreds of PIC clocks on the Net - do we need yet another one?!" Well, this one is a bit different:
- It has 16 timers that can be independently paused and restarted, and can run forward or backward.
- There are 16 alarms with configurable sounds and actions.
- Timers can show Earth, Mars, Jupiter, etc. times at the same time.
- How about sidereal time, Moon phase, Jupiter's Great Red Spot transit time, and anything periodic in general?
- Simultaneous 24-hour and Julian-time decimal display.
- All changes in configuration can be done from the device's keyboard - no computer necessary.
- External AC power with built-in rechargeable battery, so you can take the clock around.
- High on the geekness scale.
If you would like to build this clock, of if you are just curious about it, check the links below. The same information is accessible using the tabs at the top and bottom of the page.
| Construction | The construction process in pictures, step-by-step. |
| Clock Operation | How to use the clock - menu navigation, setting up timers and alarms, examples. |
| Schematics | Schematics, list of parts. |
| Code | PIC assembly code, adapting the code for a different hardware (keyboard, working frequency, etc). |
| How-To | Examples, useful tables, links, etc. |
| Other Projects | Some other projects I've been working on - mostly PIC-microcontroller stuff. |
If you have questions or comments, or if you have an error on this site, please let me know. My e-mail is at the bottom of the page. I would be also interested if you have built the clock - if so, I will appreciate any pictures from your project and would be glad to post them on this site, or to put up a link to your site.
Construction
Finally, if you want to build a Mars clock but you don't have the tools to program a PIC microcontroller, check Mars Base dot Net for another project based on a 4059 programmable divide-by-n counter and a MM5387/LM8361 alarm clock IC.
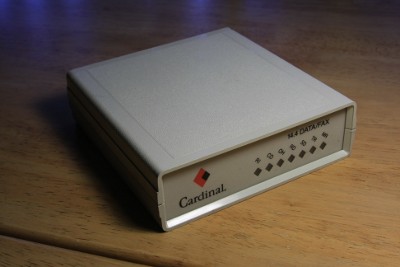

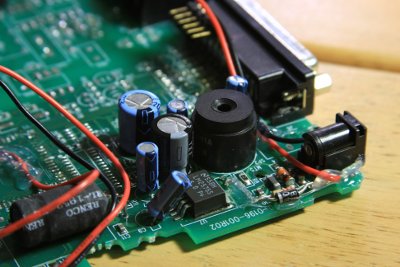
Finding the right enclosure for a project is often surprisingly difficult. You can make a nice box yourself if you have the tools, or you can buy a ready-made enclosure from places like RadioShack. My favorite approach, however, is to give new life to some old device - a modem, a computer mouse, whatever, - then to take out what I don't need and to keep anything I can re-use. In this case, a friend found for me this beautiful dialup modem from a long-gone era:
The junk electronic shop sold it for just $2.00 - way better than hobby shop enclosures. As a bonus, it had all the connectors I might need, and significant part of the electronics of the modem can be reused.
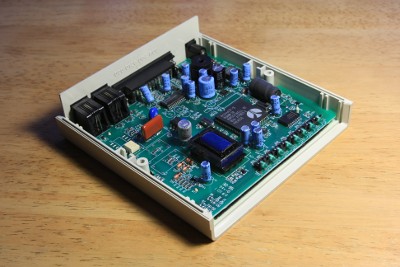
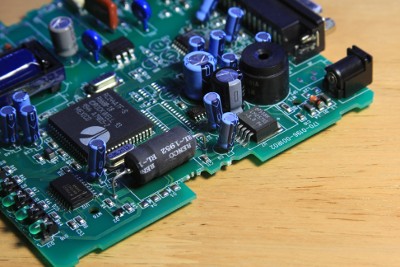
Time to take out the 10x magnifying glass and reverse engineer the schematics for the power supply on the board, and the amplifier circuits for the internal speaker. Another potentially useful thing are the LEDs in front, along with their driver chip (I haven't used the LEDs in this project yet, but decided to keep them, just in case). The rest should be taken out.
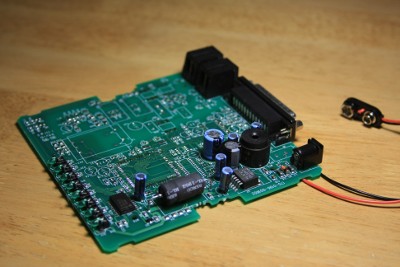
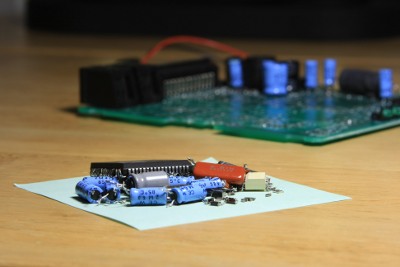
This is the "lightweight" version, after I'm finished with the soldering iron:
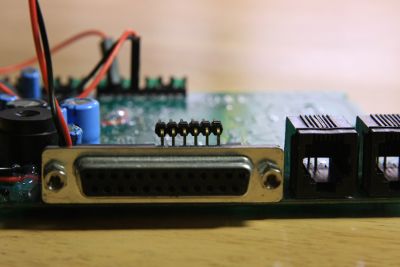
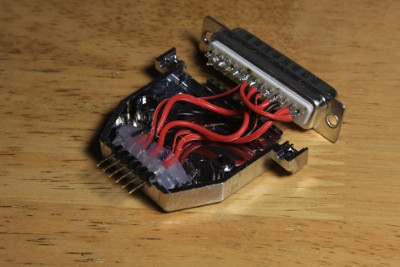
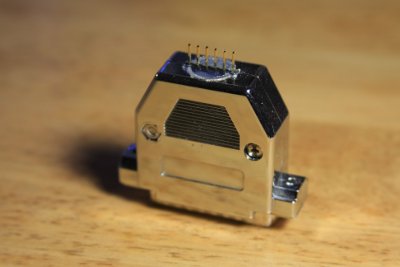
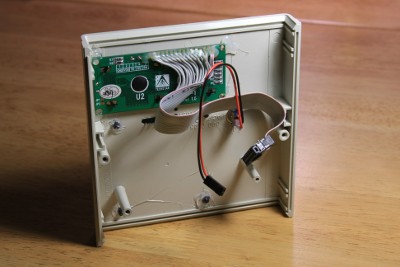
Time to decide what to do about the ports at the back. The main connector can be used to re-program the PIC without taking it out of the box. To do so, I attached some pin connectors to the internal side of the DB-25 leads so the microcontroller board can be plugged in there later:
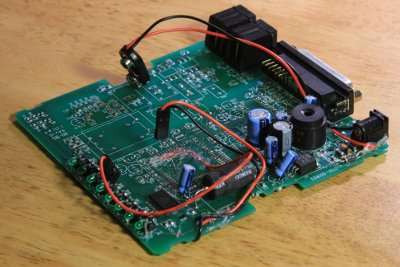
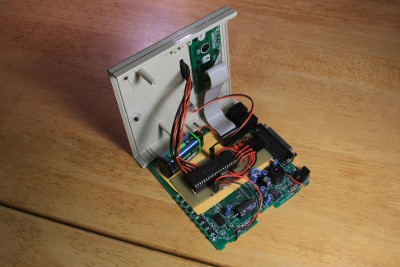
Next comes putting connectors to tap the stabilized 5V of the modem's power supply electronics. Another connector attaches to the modem's internal speaker amplifier (an easy to find LM386). Finally, I added a 9V connector for the rechargeable battery, along with a simple trickle-charger composed of a 2.2k resistor and a diode glued to the modem board:
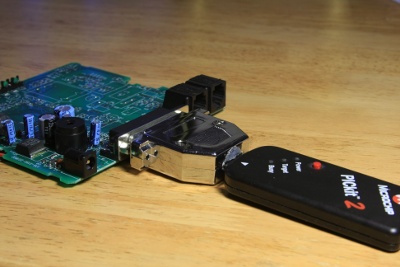
To plug it to the PICKit2 programmer, I took apart a printer cable and did some very mean things to it:
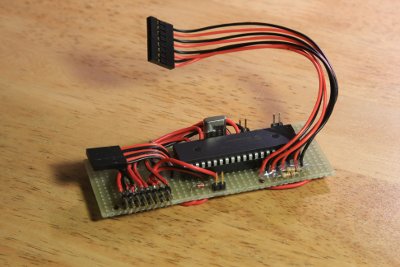
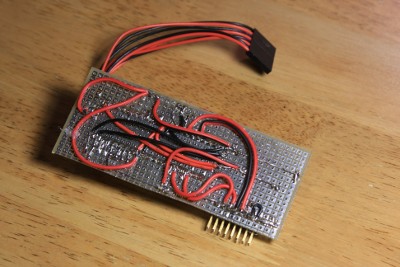
The board where the PIC and the rest of the electronics will sit is quite simple. Since we already have the speaker amplifier and the power supply, what's left is mostly connecting wires. Here is the board, in all its red-and-black glory:
Time for some drilling and filing to attach the keyboard and the LCD module with its backlight switch. Attaching the keyboard and the backlight switch was easy. Making sure that the opening for the LCD module is the exactly right size and accurately positioned was not. But with some care, the end result was quite satisfactory.
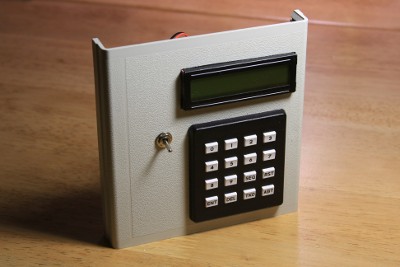
It starts to look like Monster Martian Clock already. After some hard programming, a few sleepless nights, and just a bit of magic, it is finally complete:
If I try to take it with me on a trip they will evacuate the airport, for sure!
Operation
The clock display is a 2x16 LCD module. The first row always shows the currently selected timer. The second row is used to show either the Julian time, or the current menu selection:
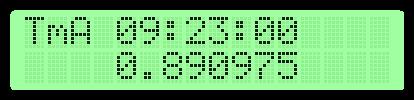
The sixteen timers are named TmA, TmB and so on, through TmP. Here, TmA is the name of the timer, followed by the current time. The second row shows the same time in Julian format (useful for astronomy and other things). The keyboard looks like this:

Not the best layout, but this is what I had on hand when I was making the clock. If you decide to build this project and have a keyboard with different layout, check Using Different Keyboard in the Code section.
The user interface of the clock is organized in menus. Pressing the  and
and  buttons will let you browse through the entries of a menu. Pressing the
  will select an entry (and perform the associated action with this entry - open another menu, set a value, etc). Going out of a menu is done by pressing the button. This will bring the previous menu up. Here is a diagram of the clock menus, followed by detailed description of each menu:
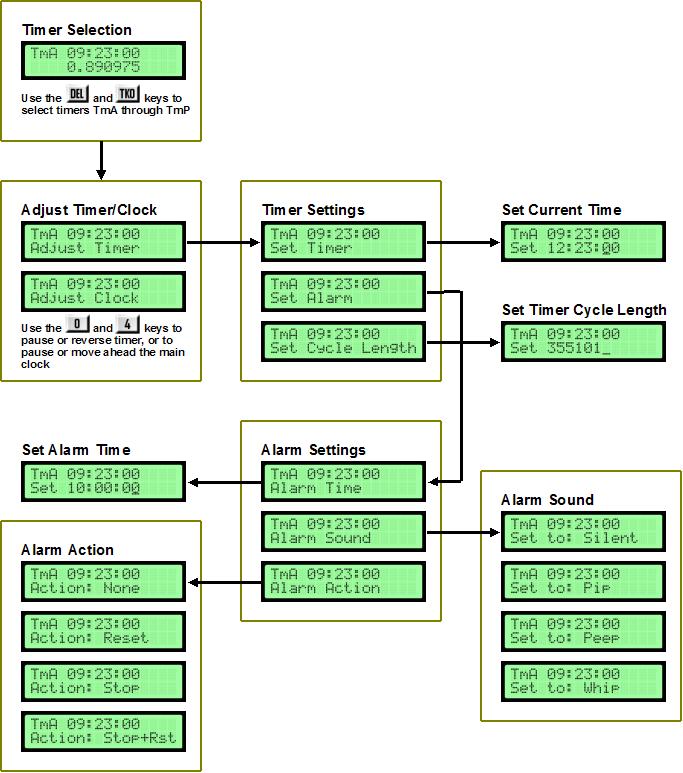
Main Menu - Timer Selection
When the clock is just powered up, you are in the "Timer Selection" menu (the screenshot above). In this mode, you can browse through the 16 timers - TmA through TmP (as with any menu, use the and buttons to select timers). If you are not sure which menu you are in, pressing the  button several times will bring you to the main menu.
Adjusting the Time [select timer, ]
If you want to change something about a timer - to set up the time, adjust the timer rate, set up an alarm, etc. select the given timer and press the button. This will bring the next menu, with two options:


When the Adjust Timer option is visible, you can use the  button to pause and restart the timer, and the
  button to switch timer direction (forward or backward). This will affect only the currently selected timer.
When the Adjust Clock option is visible, you can make adjustments to the clock that will affect all timers. Pressing the button to pause and restart the clock. Pressing button will cause the clock to jump forward one second. This way you can adjust the correct time without resetting each timer independently.
Timer Settings [select timer, ]
Select a timer, and press the button twice (once to get to the Adjust menu, and the second time to choose the Adjust Timer option). This will show you the next menu with the following options:
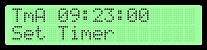
Selecting the Set Timer option and pressing will show you a screen where you can enter the new time. Enter the time using the number keys. The new time will be set when you enter all six digits (HH:MM:SS) or when you press the button. Pressing at any time will abort the operation and the time will not be set.
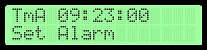
If you select the Set Alarm option, this will let you set the alarm time, sound, and action. This menu is discussed later.
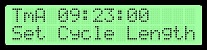
To change the timer to something other than the length of a standard Earth day (24 hours), enter the new length by selecting the Set Cycle Length option. For more details, and some sample values (for example, how to make a timer run on Mars time), check Setting the Timer Cycle Length in the How-To section. Confirm the new cycle length with the button, or cancel the operation at any time by pressing the button.
Alarm Settings [select timer, , select "Set Alarm", ]
Each timer has an alarm associated with it. This menu will let you choose between the following options:


To set the alarm time, choose the Alarm Time option and press . Enter the time. As usual, the will confirm and the will cancel the operation at any time.
Selecting the Alarm Sound option will bring you to a menu where you can choose between the following sounds: Pip, Peep, Whip and Silent. When activated, the alarm will play a short beeping sound, a long beeping sound, or something that sounds like Whiiiiip! If you select Silent, the alarm will not play any sound.
Finally, the Alarm Action option lets you choose what should happen to the timer once the alarm is activated. You have the following choice: None (no action, apart from the sound that is played), Reset (the current timer is reset to 00:00:00 and counting goes on), Stop (the current timer is stopped), and Stop+Rst (the timer is stopped and reset to 00:00:00).
Schematics
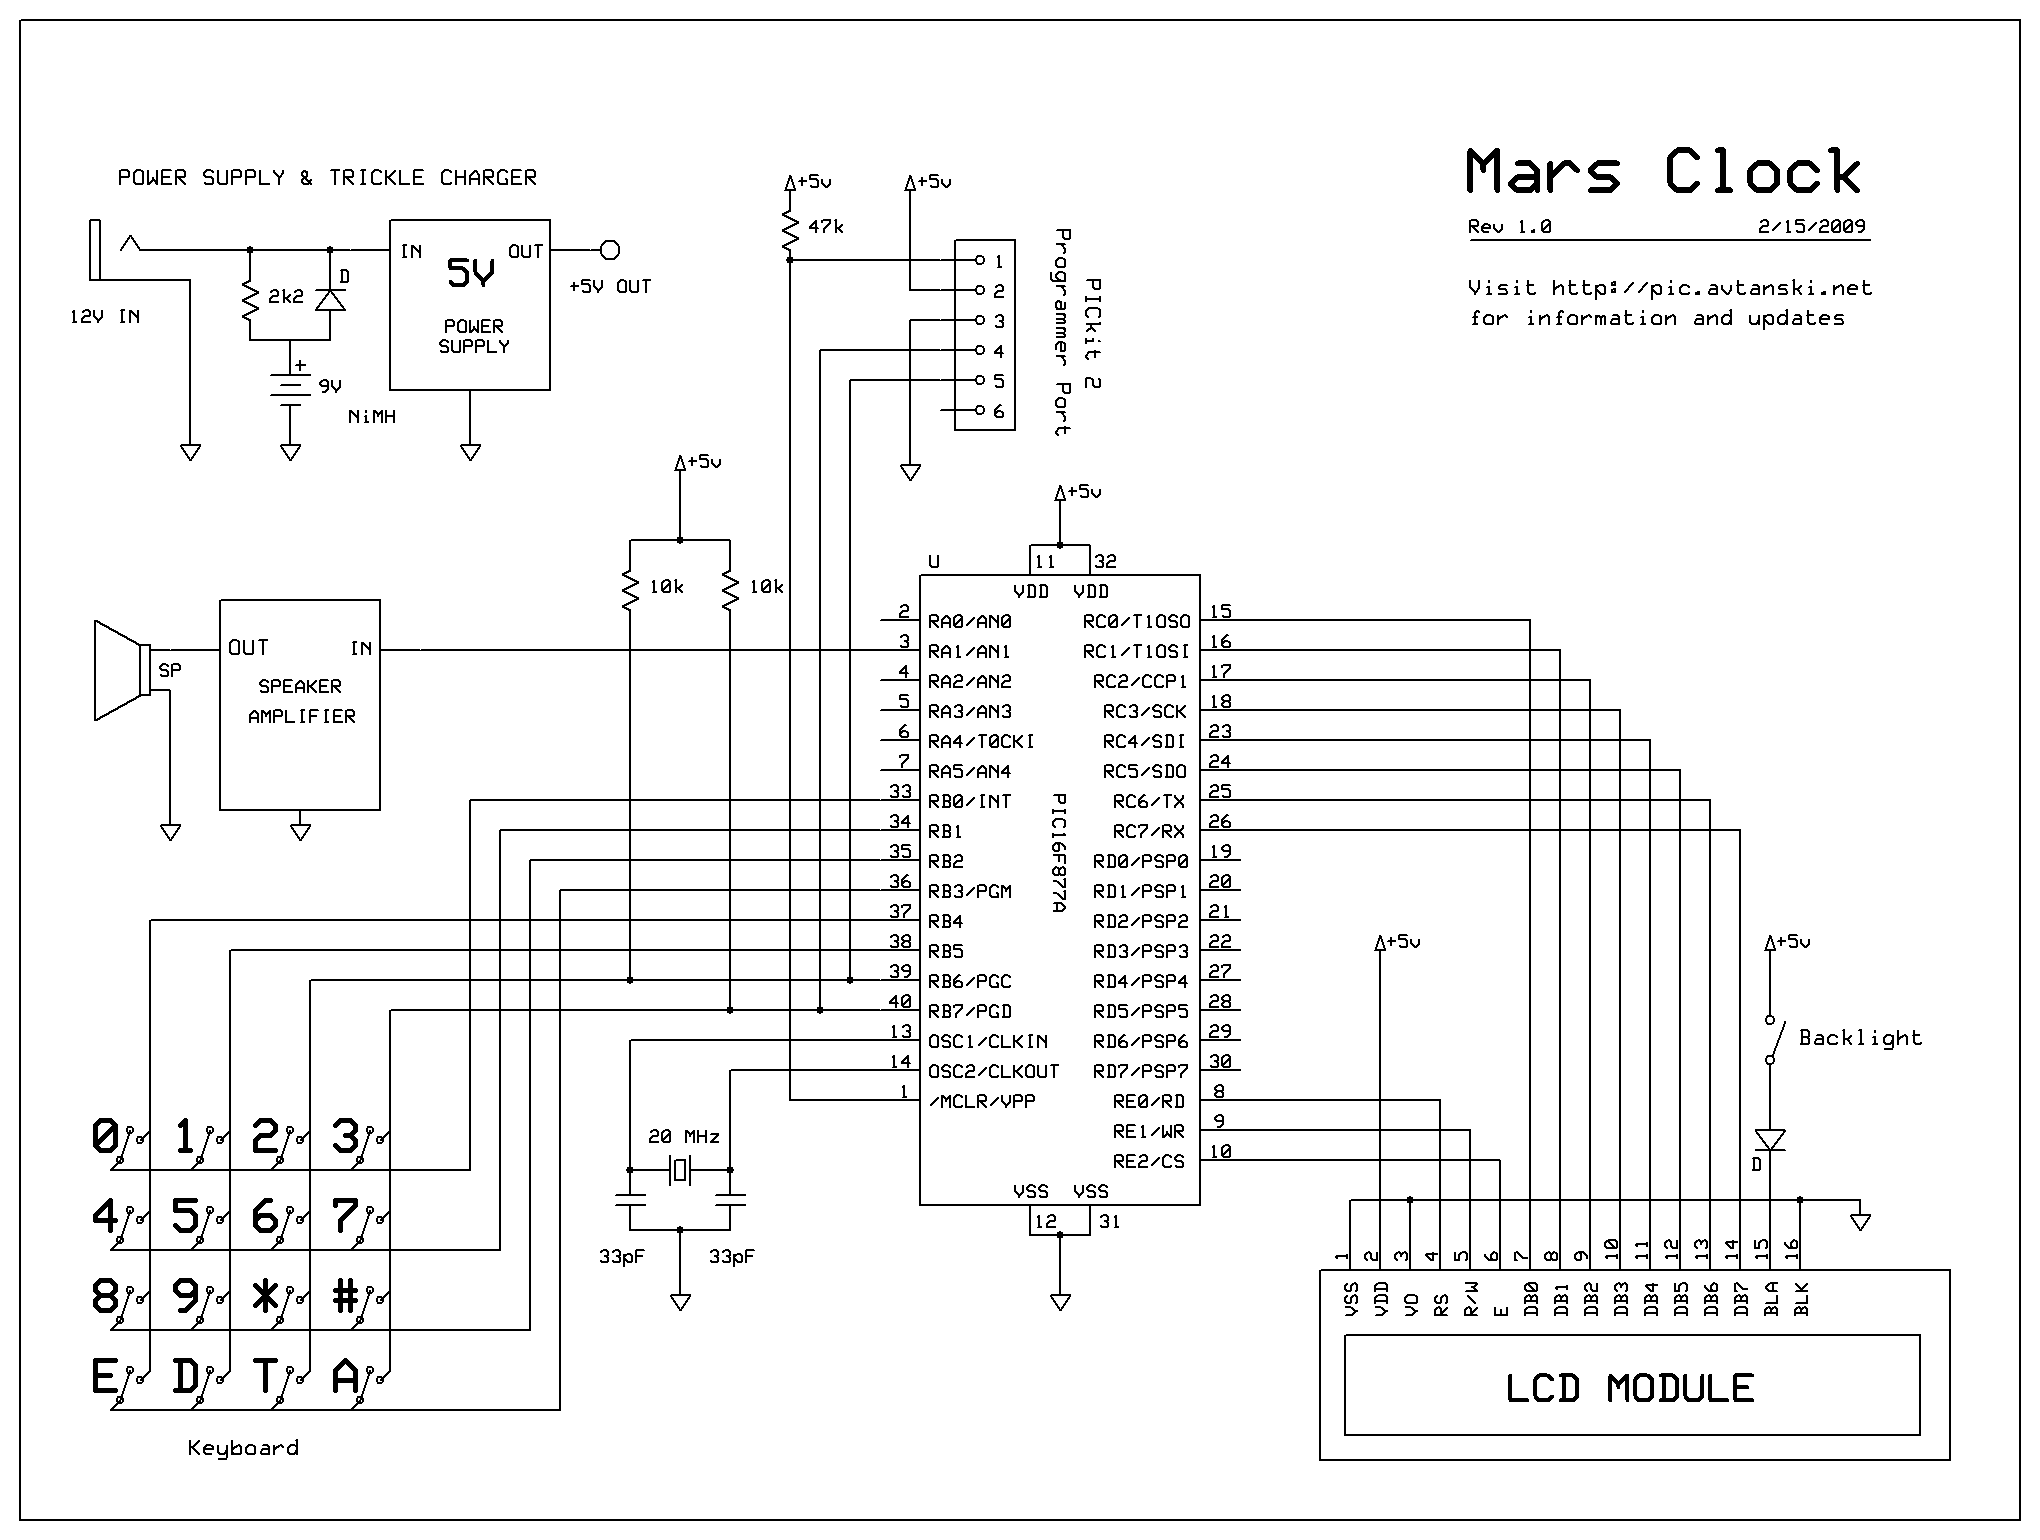
Download schematics in: [High Resolution PNG | Scalable Windows Metafile format (EMF) ]
Notes
- The 5 V Power Supply block contains the voltage stabilizer and filtering capacitors from the power supply on the modem board.
- The Speaker Amplifier block is the LM386-based amplifier circuit that was on the original modem board. The speaker is the internal modem speaker.
- The PICkit 2 Programmer port is intended for reprogramming the microcontroller without disassembling the clock. The DB25 to 6-pin adapter (see the picture) is not shown.
- If your keyboard has different layout than the one shown, refer to Using Different Keyboard in the Code section.
- I used a Techstar 16 characters * 2 lines LCD Module with backlight. These modules are pretty standard, so almost any 16 x 2 LCD module will work. Backlight is a plus, but it is not mandatory.
Code
The microcontroller program is written in assembly language. I tried to make it as extensible as possible - even at the price of increasing the code size sometimes. It has room for improvement, for sure, but it works and is not overly messy - that's enough for me. I might be updating the program from time to time - providing bugfixes and new features. If you decide to build this clock, make sure you check this site for the latest version.
| Mars Clock | v.1.3, 2009/04/04 |
| Complete MPLab Project | astro_clock.zip |
| Compiled HEX file | astro_clock.HEX |
| Main program | astro_clock.asm |
| Keyboard definitions | KBD.h |
| LCD module definitions | LCD.h |
Adjusting the Clock Rate I spent some time tuning the clock rate and got the accuracy is to a pretty good level - less than a second for a week. If your clock is doing worse than this, you can easily adjust the rate by changing the TMR_STD_LO, TMR_STD_HI, TMR_XTR_LO, and TMR_XTR_HI constants defined in the beginning of astro_clock.asm.
First, how it all works. Every time the microcontroller's T1 timer overflows, it generates an interrupt. TMR_STD_LO and TMR_STD_HI set the starting point of the timer, so increasing or decreasing those values will speed up or slow down the timer respecively. For nineteen cycles of the timer the TMR_STD_LO and TMR_STD_HI values are used, but for the twentieth the timer is initialized using TMR_XTR_LO and TMR_XTR_HI. This allows TMR_XTR_LO and TMR_XTR_HI to be used for precision adjustments.
Use the TMR_STD_LO and TMR_STD_HI for rough adjustments. The current value is $0x66C5 - increase this a bit to speed-up the clock, redice it to slow it down. I expect you will have to modify only the TMR_STD_LO byte, but if you are using a resonator running at different frequency than mine, you might have to adjust both.
When you have found the best value for this, use the TMR_XTR_LO and TMR_XTR_HI to fine-tune the clock rate. Again, to speed-up the clock, increase the two-byte number; to slow it down, decrease it. This adjustment is about 20 times more accurate than the first.
Using a Different Keyboard The keyboard that I've found for the clock (see the image in the Operation section) might not be the same as yours. If your keyboard layout does not match mine, edit the button definitions in KBD.h. In this file, all the keys are listed in order, starting from the top left, and going row by row. Reorder these definitions according the layout of your keyboard, then update the hex numbers for each key so they are sequential.
If you plan to use alternative keys for the menu navigation, stopping, starting and reversing the timers, change the definitions of the special buttons in that same file. They appear toward the end of KBD.h.
How To
This section has some examples for setting up the clock, as well as links to various useful tools and sites. And, because I called this a Mars clock, we start with...
Setting the Timer Cycle Length, or how to answer the "What time is it on Mars?" questionBy default each of the 16 timers runs on a standard 24-hour cycle. If you wish to have a timer tracking a different time period (for example, have it run on Mars time), you have to change the timer's cycle length. The timer will still show numbers from 00:00:00 to 23:59:59, but it will run faster or slower, depending on the cycle length setting. (If you wish to have a timer running at regular speed, but resetting before it reaches 23:59:59, this is another issue - use alarm setting for this timer, along with a Reset action. See the Alarm Settings section on how to do that.)
Below you will find a table of commonly used values for the cycle length. If you need to set up a timer to something that is not shown in the table below, calculate the value to use by multiplying the number of seconds in the cycle by 4 and rounding the result to the nearest integer. For example, take the Mars day in the table below - a day on Mars is 24 hours 39 minutes and 35.24 seconds long. This gives us
4 * ( 24*60*60 + 39*60 + 35.24 ) = 4 * 88 775.24 = 355 100.96 ≈ 355 101
To set a timer cycle length, select the timer, choose Adjust Timer → Set Cycle Length and enter the new value.
| Name | Time | Cycle length |
| Earth day | 24:00:00 | 345 600 |
| Earth sidereal day | 23:56:04.1 | 344 656 |
| Mars day | 24:39:35.24 | 355 101 |
| Mars sidereal day | 24:37:22.66 | 354 571 |
| Moon synodic period | 29.53059 days | 10 205 772 |
| Moon sidereal period | 27.32166 days | 9 442 366 |
| Jupiter's Great Red Spot rotation period | approx. 9 hr 53 min | 142 320 |
Once you configure the correct cycle length, you can set the timer to Mars time. You can get the current Mars time from NASA's Mars24 Sunclock. An excellent resource for all things Martian is MarsBase dot net.
Sky and Telescope's website has information on Jupiter's Great Red Spot transit times. If this link has expired, go to www.skyandtelescope.com and search for "GRS".
What is Julian Time? The second row on the clock's LCD is a decimal number that represents the time of the day in Julian format. The number is 0.0 at 12:00 at noon, and then starts increasing toward 1.0 until it 12:00 noon on the next day. Midnight is 0.5. Representing the time this way makes it very convenient to calculate time differences and is generally easier to work with than time expressed in hours, minutes, and seconds.
Julian time is used in astronomy. There, the number does not roll back from 1.0 to 0.0 each day, but keep increasing. The result is a unique number for each moment of time. Because this clock does not have date, we always show zero-point-something.
What is Julian Time?
The second row on the clock's LCD is a decimal number that represents the time of the day in Julian format. The number is 0.0 at 12:00 at noon, and then starts increasing toward 1.0 until it 12:00 noon on the next day. Midnight is 0.5. Representing the time this way makes it very convenient to calculate time differences and is generally easier to work with than time expressed in hours, minutes, and seconds.
Julian time is used in astronomy. There, the number does not roll back from 1.0 to 0.0 each day, but keep increasing. The result is a unique number for each moment of time. Because this clock does not have date, we always show zero-point-something.