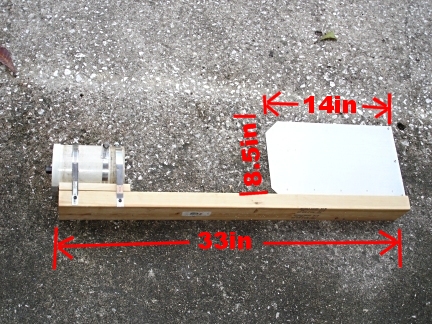
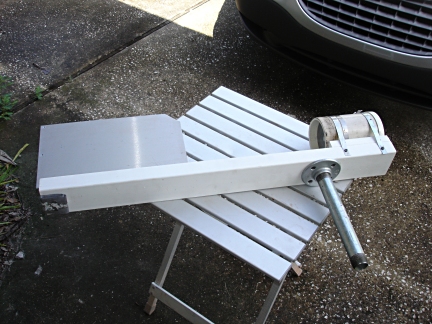
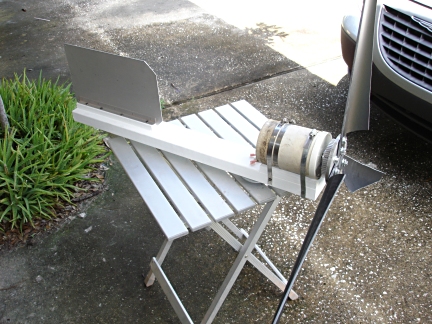
Next I needed a mounting for the turbine. Keeping it simple, I opted to just strap the motor to a piece of 2 X 4 wood. The correct length of the wood was computed by the highly scientific method of picking the best looking piece of scrap 2 X 4 off my scrap wood pile and going with however long it was. I also cut a piece of 4 inch diameter PVC pipe to make a shield to go over the motor and protect it from the weather. For a tail to keep it turned into the wind, I again just used a piece of heavy sheet Aluminum I happened to have laying around. I was worried that it wouldn't be a big enough tail, but it seems to work just fine. The turbine snaps right around into the wind every time it changes direction. For those of you always clamoring for me to provide plans, blueprints, schematics, etc., for my projects, I have added a few dimensions to the picture. I doubt any of these measurements is critical though.
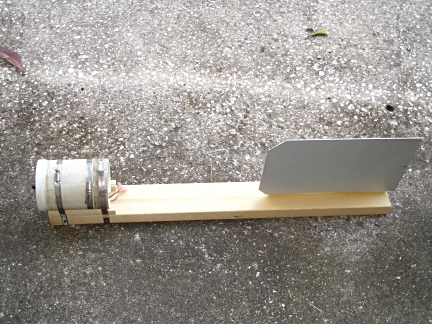
Here is another view of the completed head of the unit with the motor and tail attached.
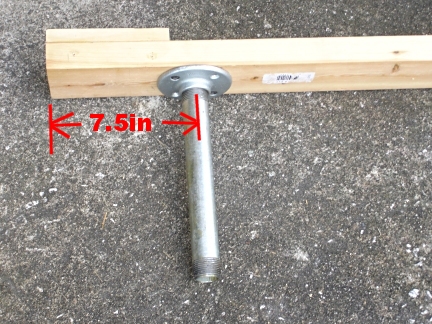
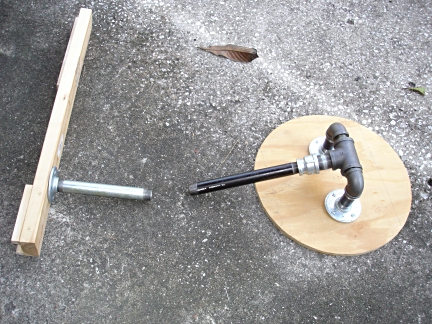
Next I had to begin thinking about some sort of tower and some sort of bearing that would allow the head to freely turn into the wind. I spent a lot of time in my local homecenter stores (Lowes and Home Depot) brainstorming. Finally, I came up with a solution that seems to work well. While brainstorming, I noticed that 1 inch diameter iron pipe is a good slip-fit inside 1 1/4 inch diameter steel EMT electrical conduit. I could use a long piece of 1 1/4 inch conduit as my tower and 1 inch pipe fittings at either end. For the head unit I attached a 1 inch iron floor flange centered 7 1/2 inches back from the generator end of the 2X4, and screwed a 10 inch long iron pipe nipple into it. The nipple would slip into the top of the piece of conduit I'd use as a tower and form a nice bearing. Wires from the generator would pass through a hole drilled in the 2X4 down the center of the pipe/conduit unit and exit at the base of the tower. Brilliant! (if I do say so myself)
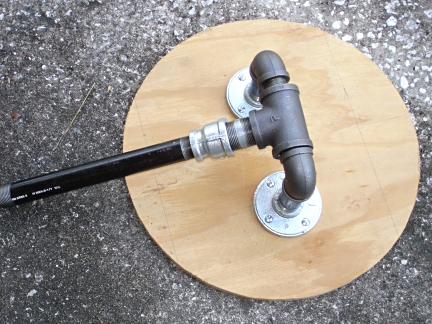
For the tower base, I started by cutting a 2 foot diameter disk out of plywood. I made a U shaped assembly out of 1 inch pipe fittings. In the middle of that assembly I put a 1 1/4 inch Tee. The Tee is free to turn around the 1 inch pipe and forms a hinge that allows me to raise and lower the tower. I then added a close nipple, a 1 1/4 to 1 reducing fitting, and a 12 inch nipple. Later I added a 1 inch Tee between the reducer and the 12 inch nipple so there would be a place for the wires to exit the pipe. This is shown in a photo further down the page. I also later drilled holes in the wooden disk to allow me to use steel stakes to lock it in place on the ground.
This photo shows the head and base together. You can begin to see how it will go together. Imagine a 10 foot long piece of steel conduit connecting the two pieces. Since I was building this thing in Florida, but was going to use it in Arizona, I decided to hold off on purchasing the 10 foot piece of conduit until I got to Arizona. That meant the wind turbine would never be fully assembled and not get a proper test until I was ready to put it up in the field. That was a little scary because I wouldn't know if the thing actually worked until I tried it in Arizona.
Next, I painted all the wooden parts with a couple of coats of white latex paint I had leftover from another project. I wanted to protect the wood from the weather. This photo also shows the lead counterweight I added to the left side of the 2X4 under the tail to balance the head.
This photo shows the finished head unit with the blades attached. Is that a thing of beauty or what? It almost looks like I know what I'm doing.
To be continued...
