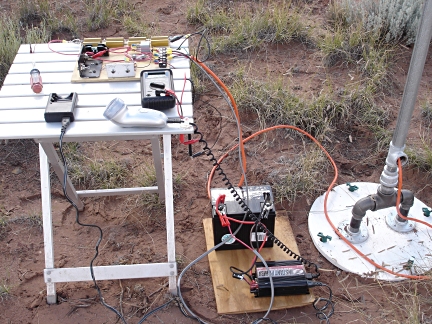
This photo shows the controller, battery and associated electronics all wired up. I have a 120V inverter connected to the battery and a multimeter to keep track of the battery voltage and wind turbine output voltage. Also my electric shaver and battery charger are plugged into the inverter and running off of 120V AC. Later I plugged a long extension cord into the inverter and stretched it back to my camp site. I know this setup is really messy, but I was in a hurry to get up and running to take advantage of the wind once it started blowing. That's my excuse, and I'm sticking to it.
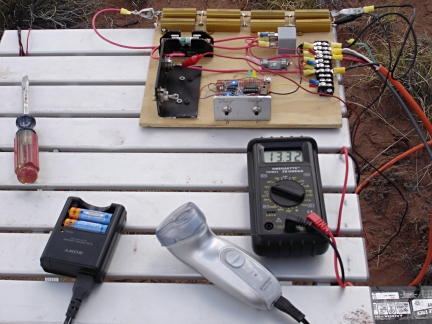
This photo is a closeup of the electronics. The meter shows that the wind turbine is producing 13.32 Volts. My electric shaver and battery charger are providing loads on the system through the AC inverter.
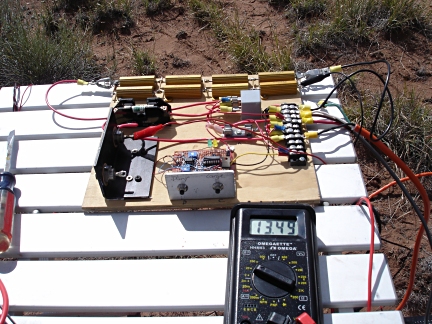
Here the meter shows the turbine producing 13.49 volts. The voltage from the turbine goes up only a little as the wind speed increases once it has a load to power. Once the wind starts blowing, the turbine head snaps around into it and begins spinning up. It spins up quickly until the output voltage exceeds the battery voltage plus the blocking diode drop (around 13.2 volts, depending on the state of the battery charge). it is really running without a load until that point. Once the that voltage is exceeded, the turbine suddenly has a load as it begins dumping power into the battery. Once under load, the rpms only slightly increase as the wind speed increases. More wind means more current into the battery which means more load on the generator. So the system is pretty much self-governing. I saw no signs of over-reving. Of course in storm-force winds, all bets are off. Switching the controller to dump power into the dummy load did a good job of braking the turbine and slowing it way down even in stronger gusts. Actually shorting the turbine output is an even better brake. It brings the turbine to a halt right now, even in strong winds. Shorting the output is how I made the turbine safe to raise and lower, so I wouldn't get sliced and diced by the spinning blades. Warning though, the whole head assembly can still swing around and crack you hard on the noggin if the wind changes direction while you are working on these things. So be careful out there.
Eventually I decided my setup was too messy and dangerous. Having high current electrical connections and a rat's nest of wires on an Aluminum table wasn't smart. The danger of a spectacular short circuit was too high, so I neatened things up. I set all the electronics on a piece of plywood on top of a plastic storage bin and neatened up the wiring. Then I ran a long extension cord from the inverter back to my camp site and plugged all my stuff into it there.

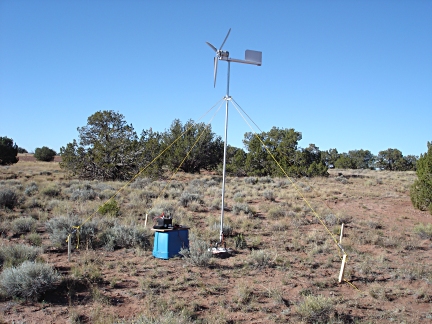
Here is a longer view of the complete setup.
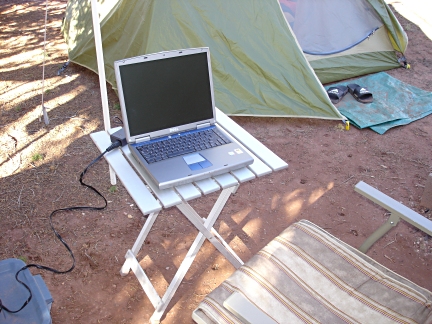
How sweet it is! I have electricity! Here I have my laptop computer set up and plugged into the power provided by the inverter, which in turn is powered by the wind turbine. I normally only have about two hours of battery life on my laptop. So I don't get to use it much while I'm camping. It comes in handy though for downloading photos out of my camera when its memory card gets full, making notes on projects like this one, working on the next great American novel, or just watching DVD movies. Now I have no battery life problems, at least as long as the wind blows. Besides the laptop, I can also now recharge all my other battery powered equipment like my cell phone, my camera, my electric shaver, my air mattress pump, etc. Life used to get real primitive on previous camping trips when the batteries in all my electronic stuff ran down.
So how much did all this cost to build? Well, I saved all the receipts for everything I bought related to this project.
|
Part |
Origin |
Cost |
|
Motor/Generator |
$26.00 |
|
|
Misc. pipe fittings |
Homecenter Store |
$41.49 |
|
Pipe for blades |
Homecenter Store |
$12.84 |
|
Misc hardware |
Homecenter Store |
$8.00 |
|
Conduit |
Homecenter Store |
$19.95 |
|
Wood & Aluminum |
Scrap Pile |
$0.00 |
|
Power Cable |
Old extension cord |
$0.00 |
|
Rope & Turnbuckles |
Homecenter Store |
$18.47 |
|
Electronic Parts |
Already on hand |
$0.00 |
|
Relay |
Auto Parts Store |
$13.87 |
|
Battery |
Borrowed from my UPS |
$0.00 |
|
Inverter |
Already on hand |
$0.00 |
|
Paint |
Already on hand |
$0.00 |
|
Total |
|
$140.62 |
Not too bad. I doubt I could buy a commercially made turbine with a comparable power output, plus a commercially made charge controller, plus a commercially made tower for less than $750-$1000.
Future modifications and enhancements I would like to make to the system include:
- Mount the electronics in a weather-proof enclosure.
- Add meters to monitor battery voltage and charge/discharge current.
- Add a tachometer so I know how fast it is spinning.
- Add more batteries to increase reserve storage capacity.
- Add a second wind turbine or solar panels to increase power production.
- Get a higher Wattage inverter.
- Some method to automatically furl or brake the unit in high winds.
- A concrete foundation for the tower.
- A taller tower with steel stakes and steel guy wires.
Most of these modifications won't be made until I am living on the site permanently, or semi-permanently. One modification I am going to work on completing in the next few months before my next trip out there is the weather-proof enclosure and probably adding the meters.
As the project evolves in the future, I'll post updates here.
To be continued
