Nophead
Although I am fortunate enough to have a project room which is nearly 3 m by 4 m, as you can see it almost completely full of junk.
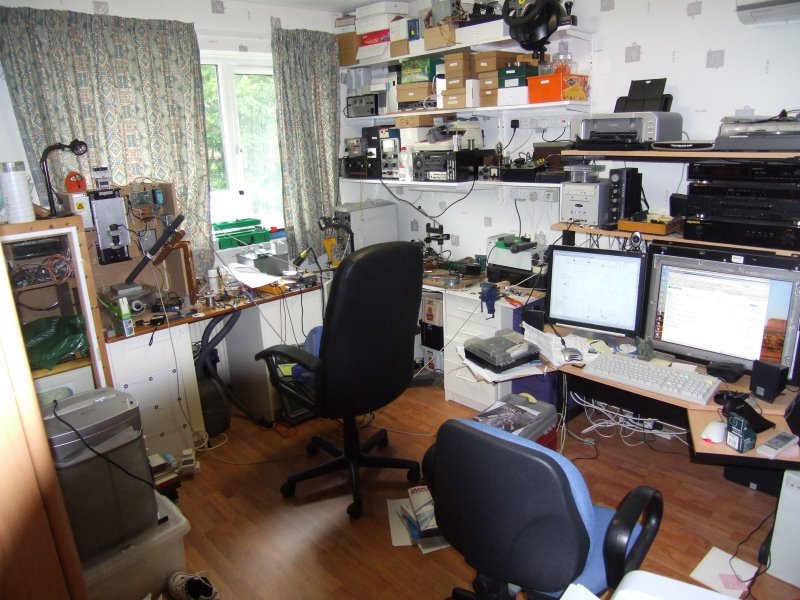
The large glass fronted MDF box on the far left next to HydraRaptor is a 400 CD jukebox that I designed and made in 1990. I used it for about 10 years until the CD player's laser wore out. At that point I ripped all the discs and stored them on my PC as mp3s. I haven't used it since but I could never bring myself to dismantle it as it is probably the best thing I have ever made. However, this week I got fed up of not having enough work space so I decided it had to go.
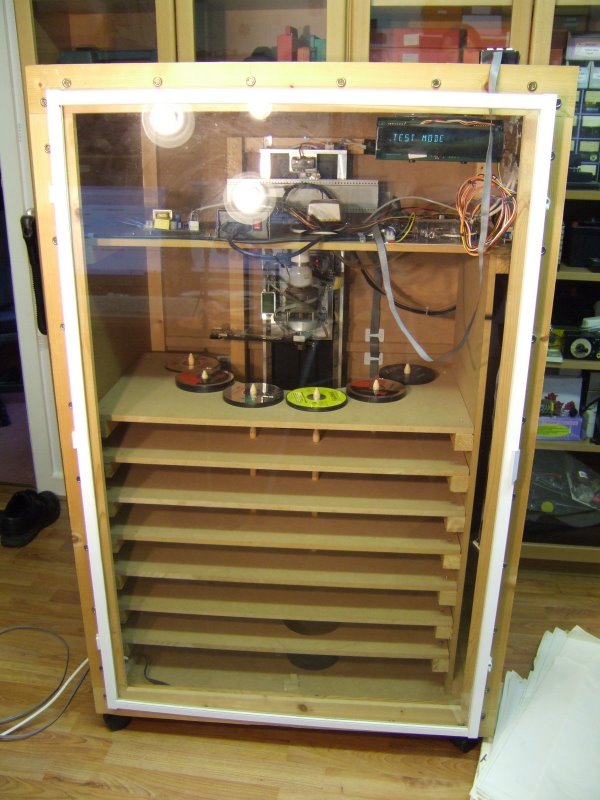
This is what it looked like. It had a sealed glass door on the front which is hard to photograph.
Here it is with the door open.
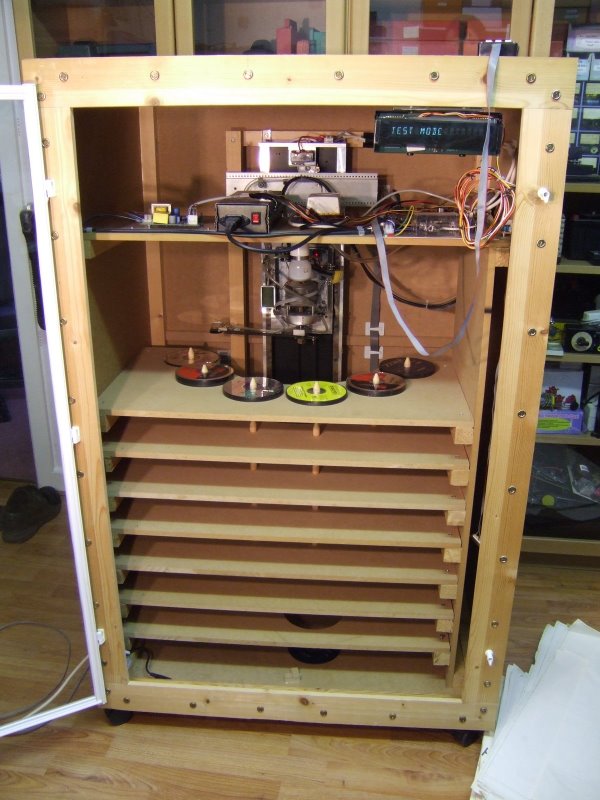
The discs were stacked 10 high on wooden pegs arranged in semi circles of six on seven shelves, i.e. 42 sites. The bottom shelf had a hole in it above the open CD player drawer and an empty peg used to store the next disc to be played.

That left 40 pegs of ten discs giving a maximum capacity of 400 discs. Worst case, to play a disc at the bottom of a peg, involved moving the nine discs above it to three nearest neighbours. This took about 40 seconds but as long as the playlist was not empty it would get the next disc ready and place it on the peg next to the player. It would then move the discs it had moved out of the way back onto their home pegs. Then it would hover above the player waiting for the disc being played to finish. When it did it would lift it out of the drawer and stash it on an the adjacent peg. It would then insert the new disc and while that was playing it would return the previous disc to the top of its home peg. That way the most popular discs tended to be at the top of their pegs for fast access.
The discs were moved by a robotic arm with a rubber suction cup on the end made out of a toy dart.
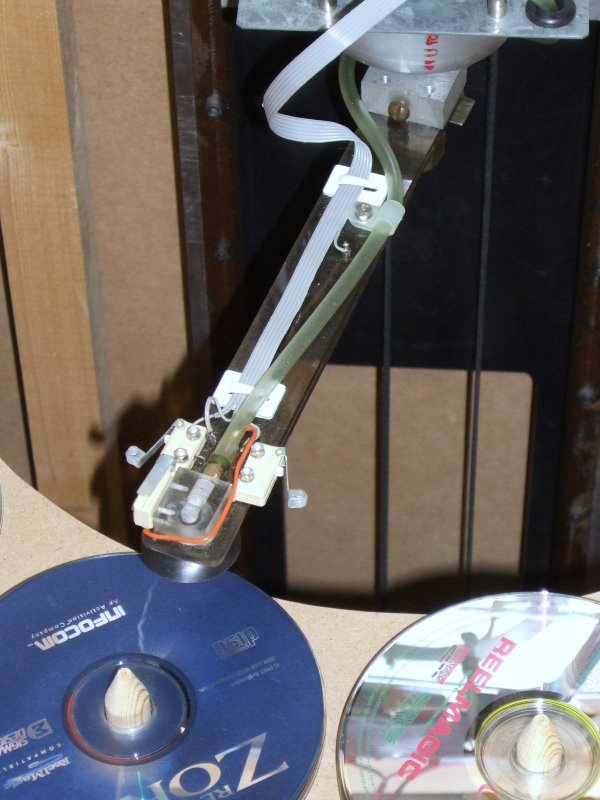
This was moved radially by a stepper motor with a gear box. It was attached to a trolley on steel rails which was moved vertically by a toothed timing belt driven by a large 12 V DC motor with a gear box. As you can see the end of the arm has three micro switches. The left hand one was used during initialisation to find the home position of the arm. The other two were just for safety. The vertical motor is so powerful it could easily snap the arm off so I wired the limit switches in series with the motor so if the software crashed and left the motor running it would do no damage.
The arm is actually made of two pieces of perspex clamped together at the hub. When the arm descends onto a disc the top piece bends way from the bottom piece and a pair of switch contacts between them part. Again this was in series with motor for safety.
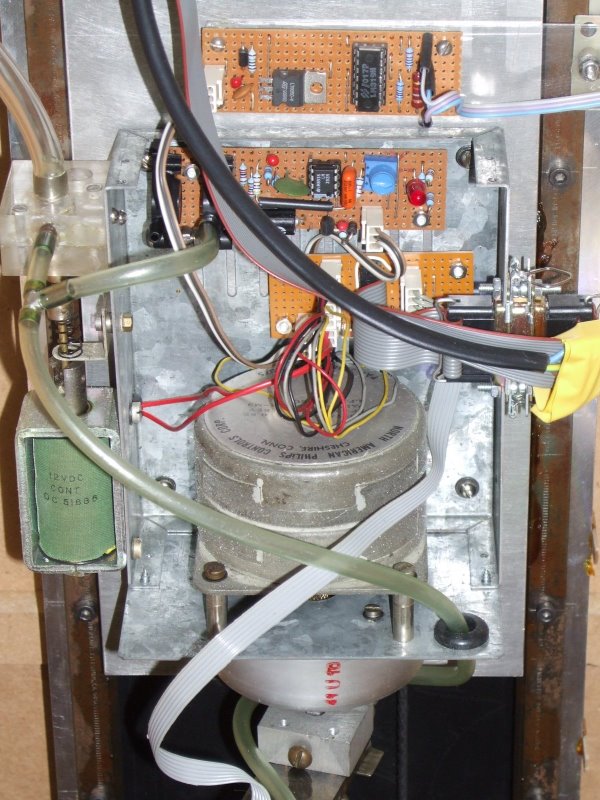
Here is a view of the electronics shelf after I removed the top :-

On the far left is a mains modem which allowed my PC upstairs to communicate with it when it was in its original home in an under stairs cupboard.
Next to that is a small switch mode PSU which powered everything.
In the middle is an aquarium pump which I used to generate the vacuum to lift the discs. I converted it from blowing to sucking by sealing the case and connecting a pipe to the air inlet underneath.
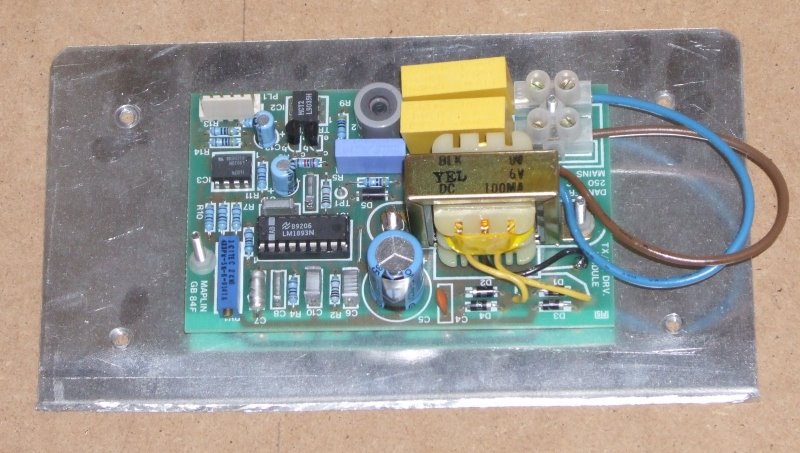
On the right is the controller :-
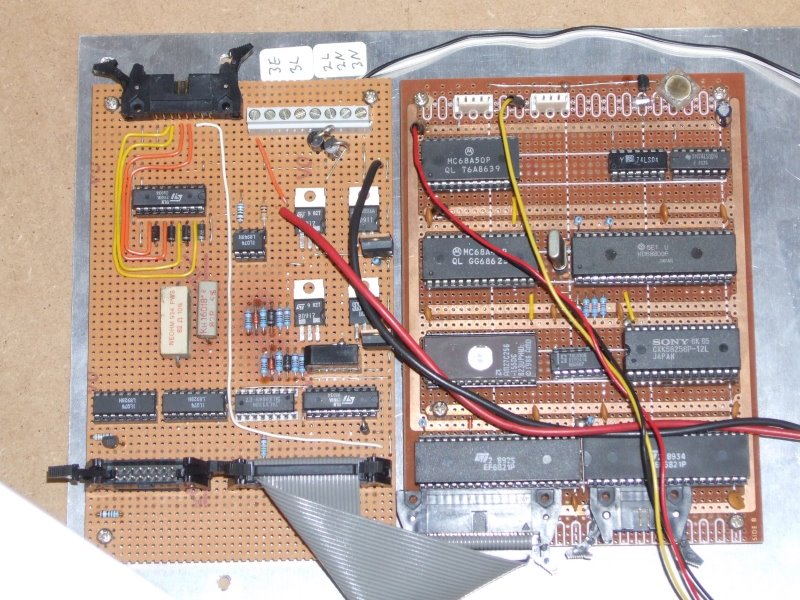
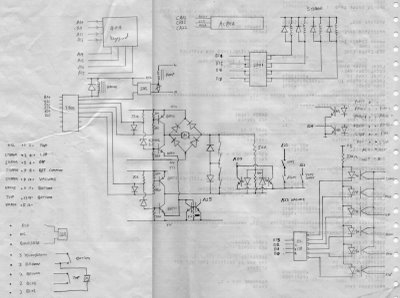
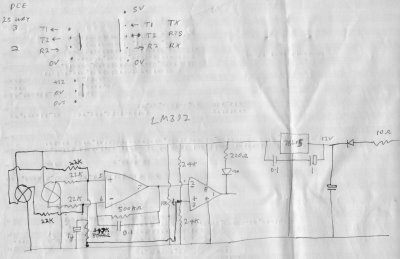
This is a Motorola MC6809 microprocessor with 32K battery backed RAM, 32K EPROM, a timer, a UART and two PIAs. Nowadays this would be a single chip. Here are the circuits, no free ECAD programs in those days :-

Here is a view with the electronics removed
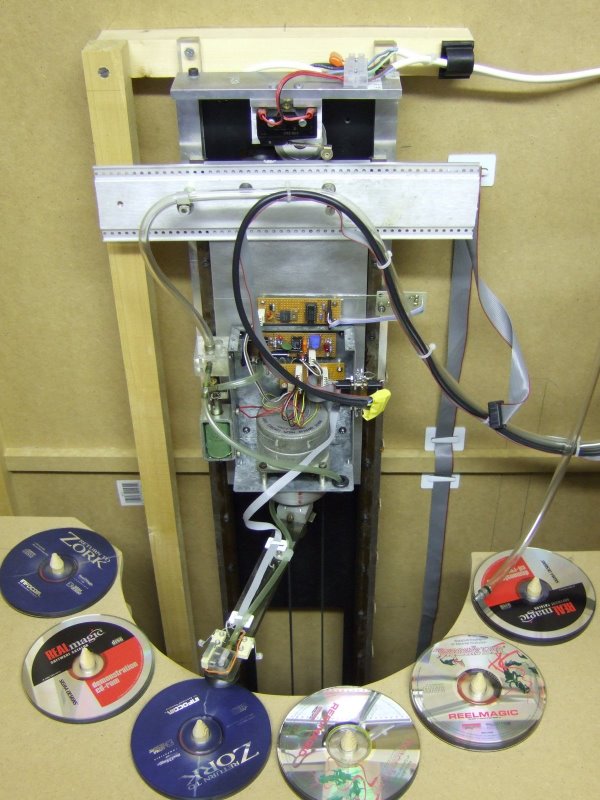
Here is a close up of the mechanics
The vacuum pump took a while to build up pressure and release it again so I made a solenoid operated 3 way valve to turn the suction on and off quickly.
The top circuit board is an opto detector which looked at tabs on the right hand rail to know where the shelves were. The board below it is a vacuum pressure sensor to enable it to know if it had failed to pick up or dropped a disc. That only happened during development really but it was vital to detect it otherwise it would lose track of which discs were on which pegs. Originally there was just one vacuum sensor but about twice a year I had to recalibrate it. Eventually I realised this was because the change in atmospheric pressure, due to weather, was greater than the vacuum level. I fixed it by adding a second sensor and measuring the difference between the vacuum pipe and atmospheric pressure. Not a very cost effective solution as the sensors were about £13 each.
Here is a video of it moving some discs. I had to drive it manually from the test routine as it would not run without a working CD player.
You probably will have noticed that each time it picks up a disc it pauses over the peg for a while. This was because the discs tended to stick together by suction after being pressed by the weight of the ones above. This was mainly cured by putting a small circular spot label near the centre of the disc to break the seal. The delay gave time for the second disc to drop back onto the peg if it did initially lift.
So now it is no more, but perhaps I might reuse the vacuum system and the metre long axis for some sort of pick and place machine.
