This is the page for the MakerBot watch. It's a portable and fashionable arduino environment that you can take with you. It also tells the time.

Specs:
- Atmel Atmega328 chip with Arduino bootloader on it.
- 6 pin header for bootloading. Also includes access to 4 I/O pins and power and ground
- 6 pin header for programming.
- 4 pin extension header for plugging in other things like sensors or shields that extend the watch.
- 16mhz crystal.
- Piezo buzzer
- 3 pushbutton switches
You will need a serial ttl cable and usbtiny programmer.
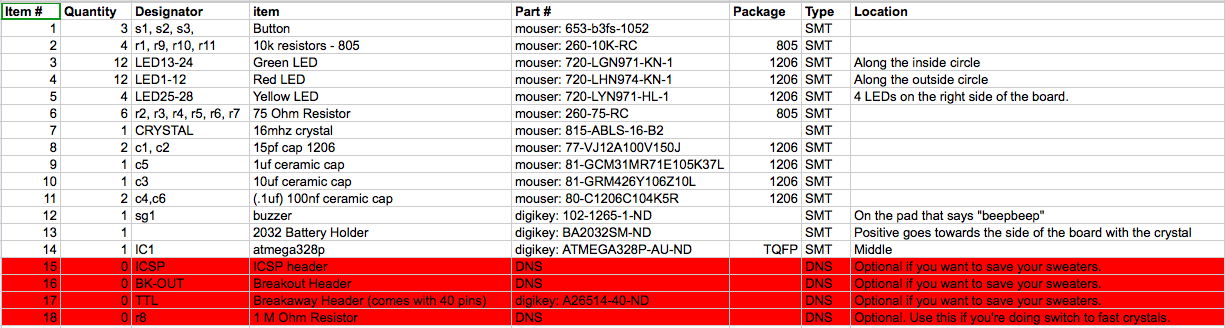
Here's the makerbot watch part list, and here's the schematic for users without a copy of Eagle.
Click to enlarge
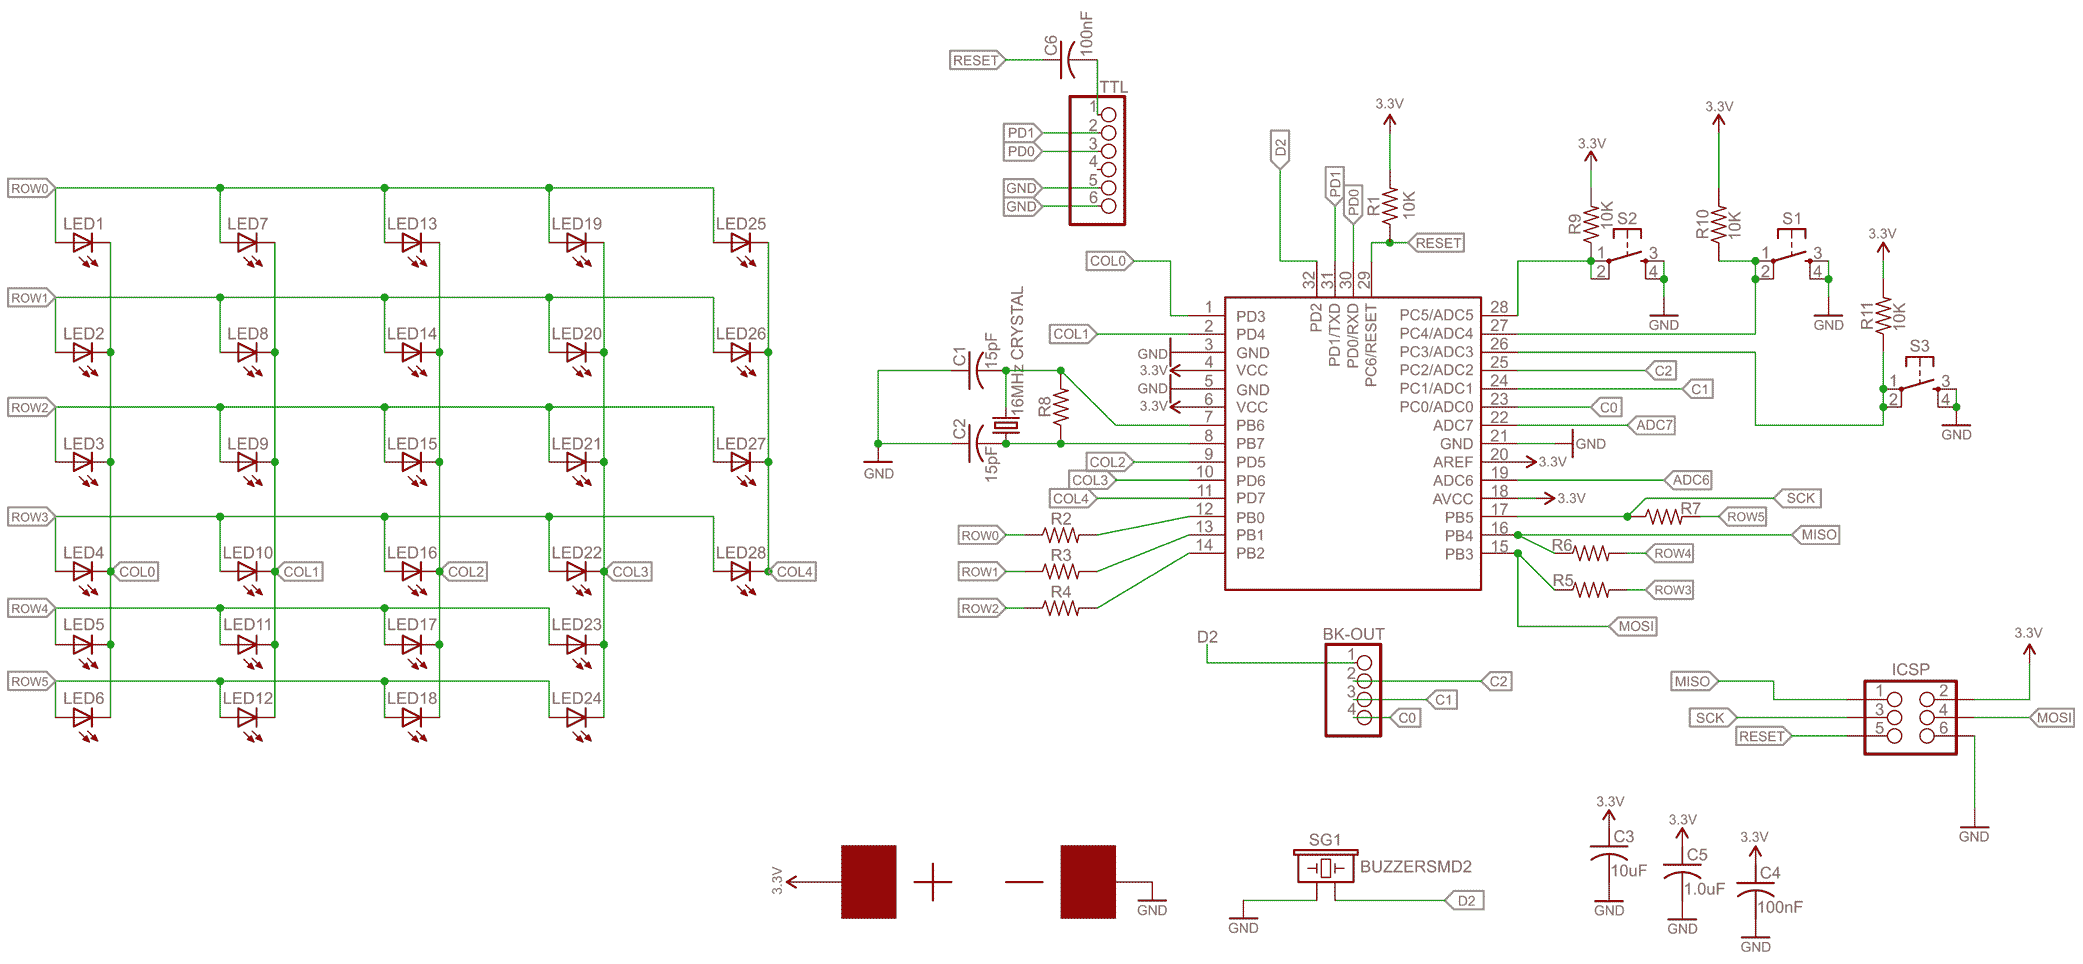
It has 12 LEDs to mark the hour and 12 LEDs to mark the 5 minute marks plus an extra 4 LEDs to mark the 4 extra minutes that aren't shown. So if it was 12:04 the hour LED in the 12 position would be lit up and the Minute LED in the 12 position would be lit up and the 4 extra minutes would be lit up to show that it's 12:04.
Besides having it work on a watch, there are a number of other possibilities because it's an arduino on your wrist!
I'm looking into the possibility of lasercutting or makerbotting the watch case.
Schematic and board designs in download section.
A new revision, whose idea originated on the MakerBot Watch google group, has been designed. Prototypes are being built at this time.
This new revision implements the following changes:
- Board is now powered via a 110mAh li-polymer battery
- Charging chip on board - MCP73831 from Microchip
- Micro usb port to charge the watch
- Switch count reduced to two
- Atmega328 (or atmega168) now clocked with a 8MHz crystal
- RTC chip on the i2c bus - DS1337
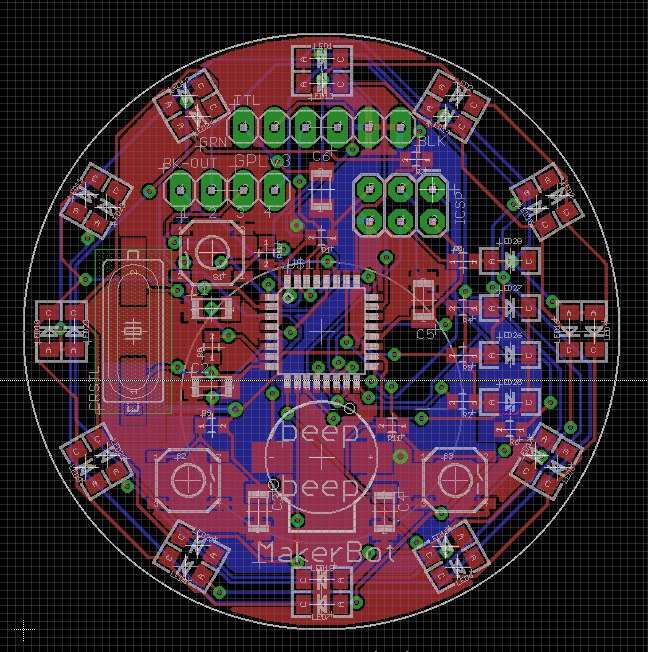
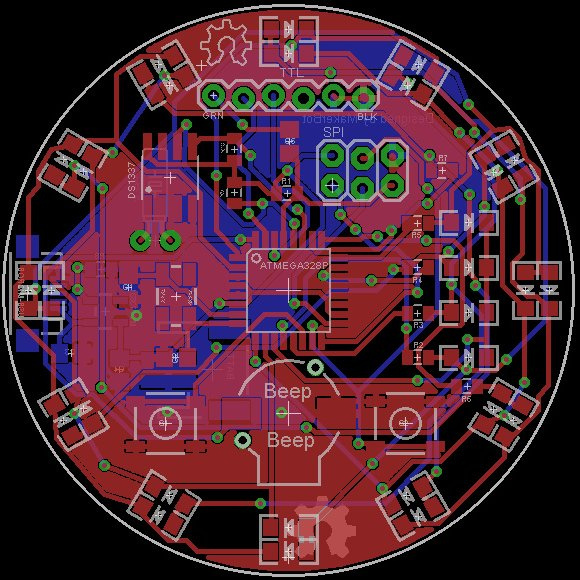
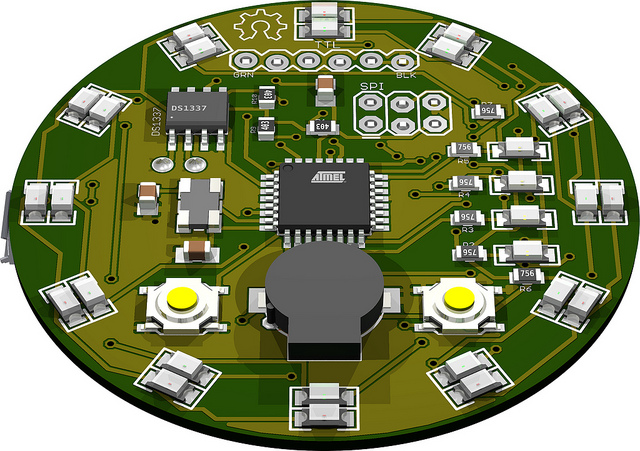
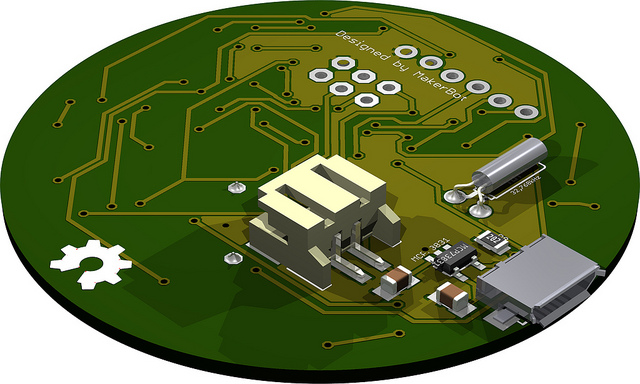
Here is a render of the new board:
3D render of the boards have also been made.
Here is what the top of the board might look like:
And here is what the bottom of the board might look like:
In order to make this work you have to change a text file in the arduino environment. This is because this arduino has a crystal and is basically a regular arduino except that it is running at 3 Volts and the brownout circuit turns things off at 2.8 volts which is not good. This also lets you select your MakerBot Watch from the board choices. Adam figured this out because at this point he's ripped most of the guts out of arduino on the MakerBot project.
Downloads
- Schematic
- Library (MakerBotWatch.h — header file that defines MakerBotWatch class with lots of support #defines,MakerBotWatch.cpp — source for MakerBotWatch class defintions,watch_test.pde — test sketch for simple clock using MakerBotWatch class, MakerBotWatch_V1.1.h — a slightly modified header file, MakerBotWatch_V1.1.cpp — a slightly modified source file, MakerBotWatch.pde — code that can set the time as well as an alarm, Test Pattern) - download
- Resources: