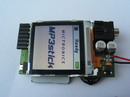
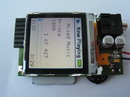
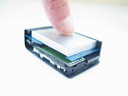
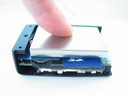
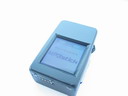
The MP3stick is a simple and small portable MP3 player. A microcontroller Atmel AVR ATmega128 is the heart of the circuit. MP3 decoding is done by an VLSI VS1011b decoder IC. A MMC/SD card works as memory medium for MP3 files, playlist files and skin files. The player is designed to draw his power from a LiIo/LiPo battery with 3.6 V. a charger cicuit, based on MAX1811, is included. All information will be shown on a Nokia color LCD with 128 x 128 pixel and 256 colors. The player will work in text-only mode and if a skin file is available, also with nice graphic skins. A docking port allows outside connectivity for serial control signals, audio signals and charger voltage input.


|
|
|
|
|
|
|
|
|
|
|
|
|
|
|
|
|
|
|
|
|
|
|
|

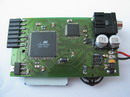

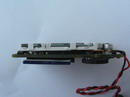

- IC4 ATmega128L-8AU Main controller running at 8 MHz internal RC oszillator, circuit is ATmega1281 or ATmega2561 compatible
- IC2 VS1011b MP3 decoder IC
- IC3 LM2940IMP-5.0 Low drop fixed voltage regulator, supplies 5 V to battery charger from 5-26 V input voltage
- IC5 MAX1811ESA LiIo/LiPo battery charger, set to 100 mA charging current, selectable battery type
- IC6 LP2981IM5-3.3 Low drop fixed voltage regulator, main 3.3 V power supply
- IC1 LT1932 White LED driver, power supply for LCD backlight
- LCD1 Nokia color LCD from Nokia 6610 phone, connected via Hirose DF23 connector PCF8833 STN RGB - 132 х132 х 3 driver
- SW1 Alps SLLB Slide and push button switch made by Alps
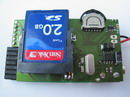
- CARD1 FPS009-3002 Yamaichi SD/MMC slot
- K4 7pin Header
- Docking port , 2.54 mm / 0.1"
- Pin out
- 1 - Charger input 5-26 V
- 2 - Serial input, 19200 Baud, 3.3 V level
- 3 - Serial output, 19200 Baud, 3.3 V level
- 4 - GND
- 5 - Left audio out
- 6 - Right audio out
- 7 - Not connected
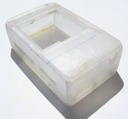
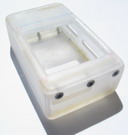
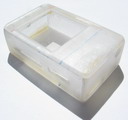
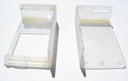
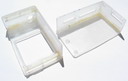
- PCB size without battery: 60 x 35 x 11 mm
- Player overall size: 22 x 39 x 64 mm
- Test voltage 4.1 V
- Play mode, LCD Backlight OFF, 2 GB card 52 mA
- Play mode, LCD Backlight 50 %, 2 GB card 66 mA
- Play mode, LCD Backlight 100 %, 2 GB card 85 mA
- Stop mode, LCD Backlight OFF, 2 GB card 27 mA
- Stop mode, LCD Backlight 50 %, 2 GB card 42 mA
- Stop mode, LCD Backlight 100 %, 2 GB card 58 mA
- Sleep mode, 2 GB card 860 uA
- Sleep mode, no card 540 uA
- Written in C for WinAVR compiler based on avr-gcc v3.4.5 or higher including avr-libc v.1.4.3 or higher
- Supported file system FAT32
- Direct M3U playlist support
- ID3 v1 & v2 tag support (title, artist, album, title length[v2])
- Color skin/theme support, Yampp3USB/Yampp7 compatible
- Adjustable LCD contrast, backlight brightness and auto off time, bass enhancer in VS1011b, volume and balance
- All adjustable options are stored in EEPROM
- Serial IO interface
- 3.5 mm audio jack
- External audio via docking port
- One key handling
- Battery voltage monitoring
- Auto power off on low battery
- Remote control via serial interface
- Information output for firmware and bootloader via serial interface
- Stop mode
- Up - no function
- Center short press - no function
- Center long press - enter menu
- Down - no function
- Play mode
- Up - previous title
- Center short press - no function
- Center long press - enter menu
- Down - next title
- Menu mode
- Up - previous menu entry / increase selection
- Center short press - execute function, select/deselect entry to modify
- Center long press - no function
- Down - next menu entry / decrease selection
- Play - g
- Stop - G
- Next title - n
- Previous title - p
- Next playlist - N
- Previous playlist - P
- Menu - M
- Up - U
- Down - D
- Enter - E
- Sleep - S
- PLAY / STOP
- start and stop playing
- NEXT TITLE
- select next title
- PREV TITLE
- select previous title
- NEXT PLAYLIST
- select next playlist
- PREV PLAYLIST
- select previous playlist
- VOL
- change volume, range 0 - 10
- BAL
- change balance, range -10 - 0 - +10
- BASS Hz
- change bass boost low limit frequency, range 0-150 Hz
- BASS dB
- change bass boost amplitude, range 0-15 dB, 0 dB turns the booster off
- RANDOM
- change random play mode
- OFF - normal play mode, song after song, single playlist
- SONG - random song from actual playlist
- PL - song from random playlist
- PL+SONG - random song from random playlist
- PL->PL - song after song from all playlists
- BLIGHT s
- change backlight auto off time, range 0-25 s, 0 means always on
- BLIGHT %
- change backlight brightness, range 0-100 %
- CONTRAST
- change LCD contrast
- SLEEP
- turn player off, set into sleep mode
- BOOTLOAD
- call the bootloader for firmware loading
|
Firmware, released under GPL, see licence.txt for details.
Now with ID3 tag support. |
|
|
MMC/SD card bootloader, released under GPL, see licence.txt for details. |
|
|
Atmel tool set to calibrate the internal RC oscillator to 8 MHz. Atmel STK500 development board required! |
|
|
Project schematic Issue 11b |
|
|
Gerber files for PCB manufacturing |
|
|
Bill of Material |
|
|
Default skin with iP*d style, includes the skin packer tool |
Used develompent tools :
Programmers Notepad v2.0.6.1
WinAVR (GCC) 3.4.5
How to use the Bootloader
- Only for empty controller: Programm the bootloader into the ATmega128 using a In-Circuit-Programmer (ISP)
- Compile the firmware as required, or use the precompiled firmware file.
- Copy the firmware binary file: MP3stick.bin to the root directory of your MMC/SD card
- Cycle power or call the bootloader from menu
- The bootloader will search the root directory for the file MP3stick.bin. The file will be deleted by the bootloader after programming the uC.
- You can monitor bootloader activity via serial interface.
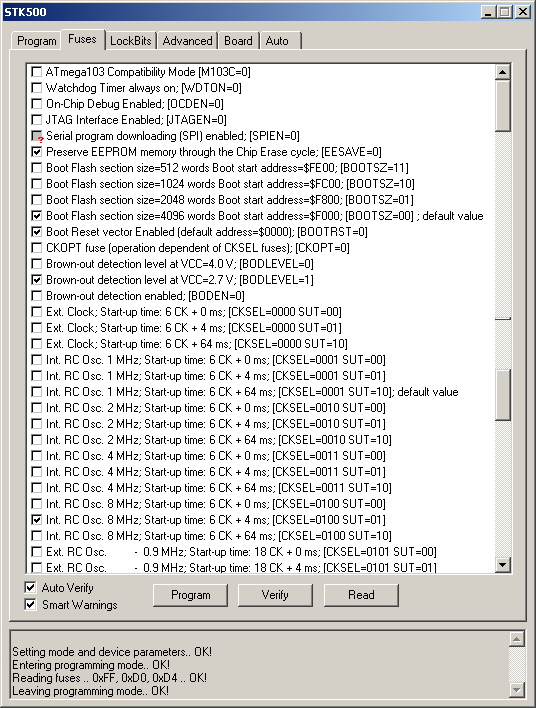
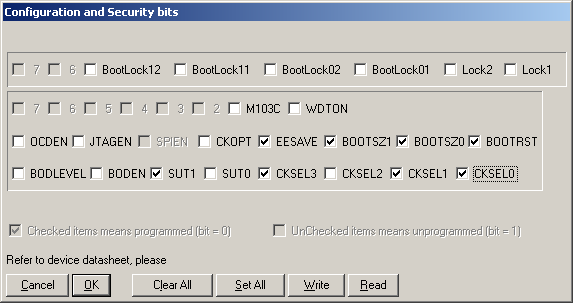
Fuse Settings in AVR-Studio and PonyProg2000
Not tested in PonyProg2000!
How to M3U playlists
- Copy your MP3 files to SD/MMC card as required. Don't care about file and folder names or directory structure.
- Create an M3U playlist from your SD/MMC card content. Save this playlist root directory of your card. The first 32 characters of the filename will be equal to MP3stick playlist name.
The firmware supports normal and extented M3U playlists, where the extented format is preferred.
- Download the iPod theme skin. All required files are included.
- Change the BMP images as required, read the Bitmaps.txt file about there format and decription.
- Change the lcd_layout.h as required. If you change this file you must recompile and reload the firmware with this file included.
- Run the skin_packer.exe to compress all BMP images to one binary file, the skin.skn.
- Copy the skin.skn file to your SD/MMC card root directory.
Note: The MP3stick player will work without *.skn file, but in text-only mode then.
- Connect the MP3stick PCB to your STK500 development board via ISP interface. For pin-out see schematic file page 2.
- Program the correct fuse settings. See pictures above.
- Unpack the ZIP file and run the batch file "ISP_rc_calib.bat". The tool will tell you the RC calibration byte after successful calibration process. STK500 is expected on COM1.
- Enter the calibration byte in firmware file "firmware_conf.h" then recompile and update the firmware on your player.