Smilodon
A while ago I made a door with a glowing image to go between my hall and living room. It worked great for a while, but it had a few flaws.
First of all it got a bit bent when the wood dried. (I thought the glued wood sandwich I used would prevent this... I was wrong...)
It also had just one sheet of plexiglass. Problem with this is that when the glass gets dirty the dirt will glow when it comes in contact with the glass. And so does fingerprints (Everybody just HAVE TO put their fingers on the glass...)
So, to encounter all these problems I decided to make a New door.
This time I went for chip wood board to get it straight and stable. I also used a 4 layer glass. Two outer layers of 3 mm float glass and two inner layers of 3 mm plexi glass where the image were engraved. I had to use plexiglass as it conducts light way better than normal glass.
OK, let's get on with some pictures!:
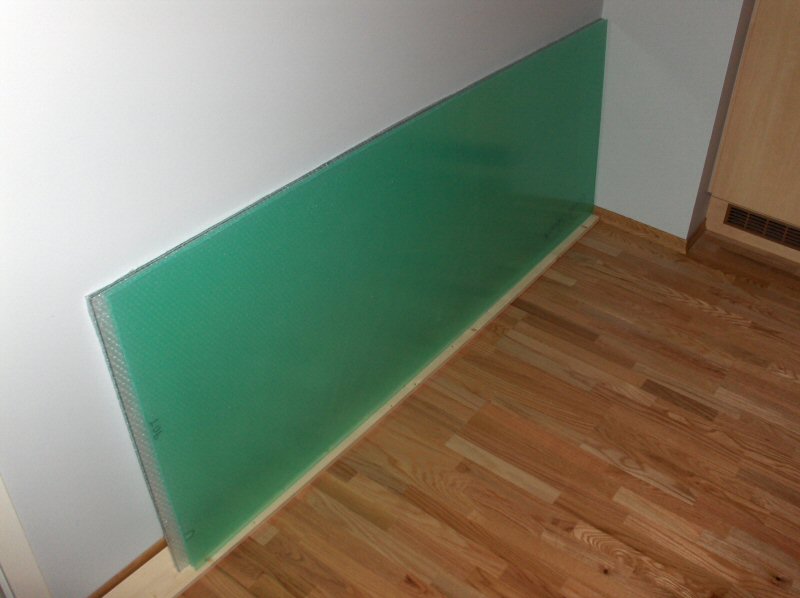
Here are the four sheets of glass. (quitebit of organizing to get them home, but that's another story.) They are green because of the protective plastic, BTW.
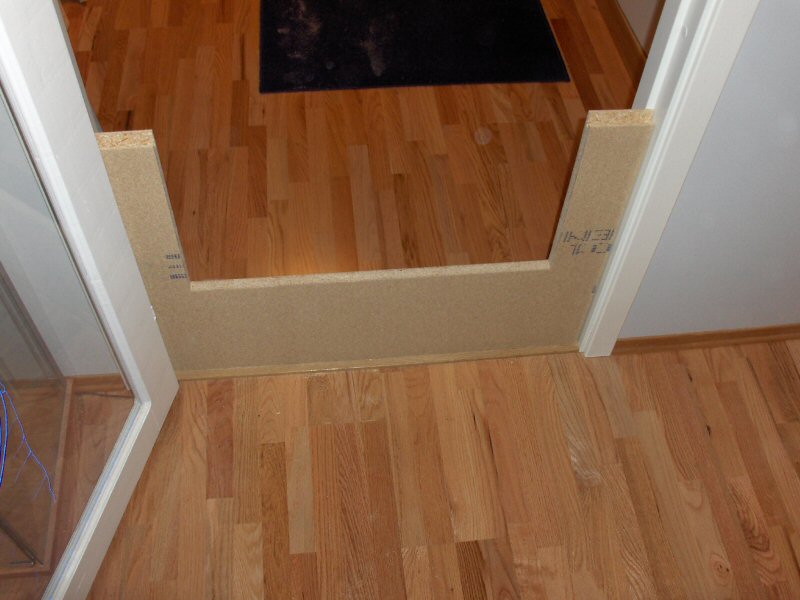
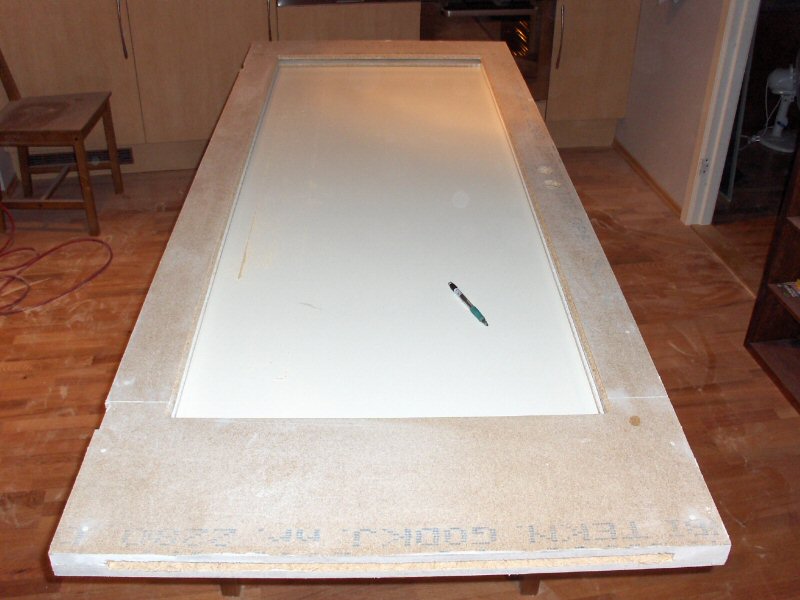
Here is the first piece of chip wood board cut to shape. Nothing interesting, really. Just a whole lot of cutting. I also had to use a router to shave 2 mm of all the pieces. The sheets i got were 22 mm thick, and the door is 40mm. This was a hell lot of work. I also had to mill out grooves for the glass to fit into. I have no pictures of this process, unfortunately. It's not that interesting anyway.
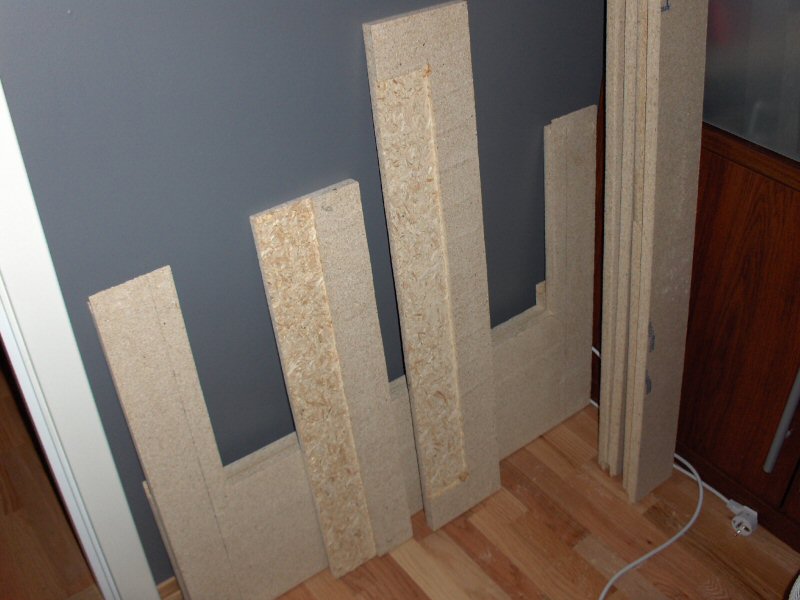
All the pieces cut to shape. The two pieces in the middle are also milled. You can also see that the chip wood boards use larger chips in the core. More on this later...
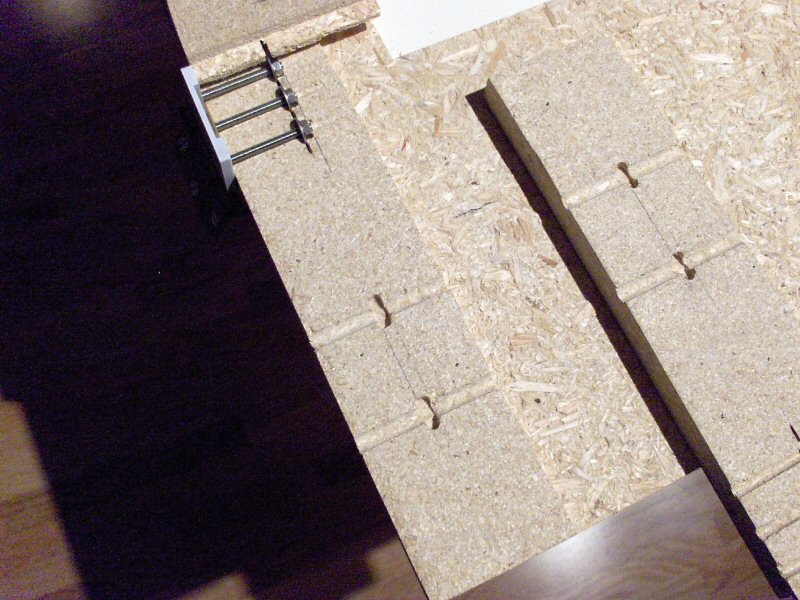
This is the bottom of the door. Because of the weight of the door i was worried that normal wooden screws would just be ripped out. To be sure i milled out small grooves in between the two layers of wood boards. In there I glued three M5 nuts and washers. (A4 stainless. Just to be sure) Below there you can see some grooves for two 6mm nuts and two threaded rods. These are the support for the glass. The glass is fed trough the bottom of the door. (the top would have been easier, but couldn't be done because of the structural strength of the frame.) Under the glass these is a piece of wood, and the two threaded rods. there is also a block of wood between the treaded rods to stiffen everything up, and to distribute the weight.
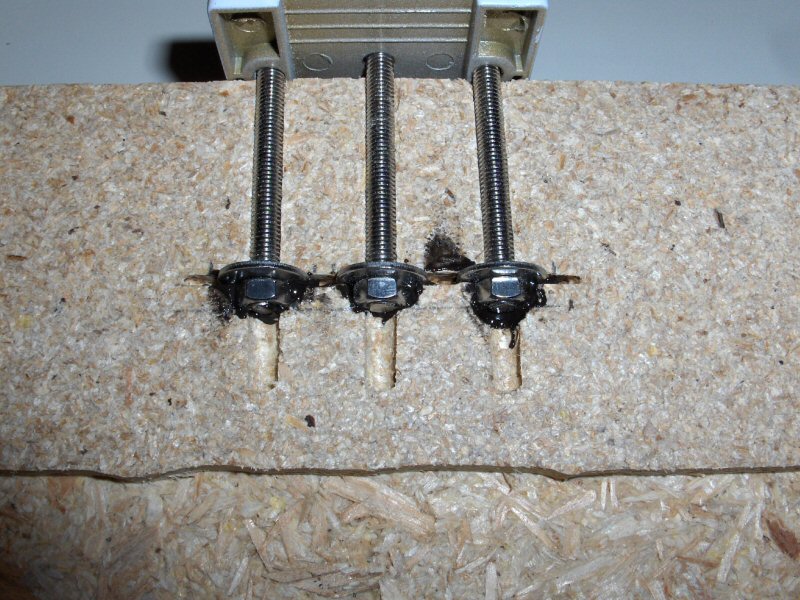
Detail shot of the nuts and washers for the hinge. The hinge and screws are there to ensure that the nuts stay in the right place when gluing.
Everything glued up. and some filler added.
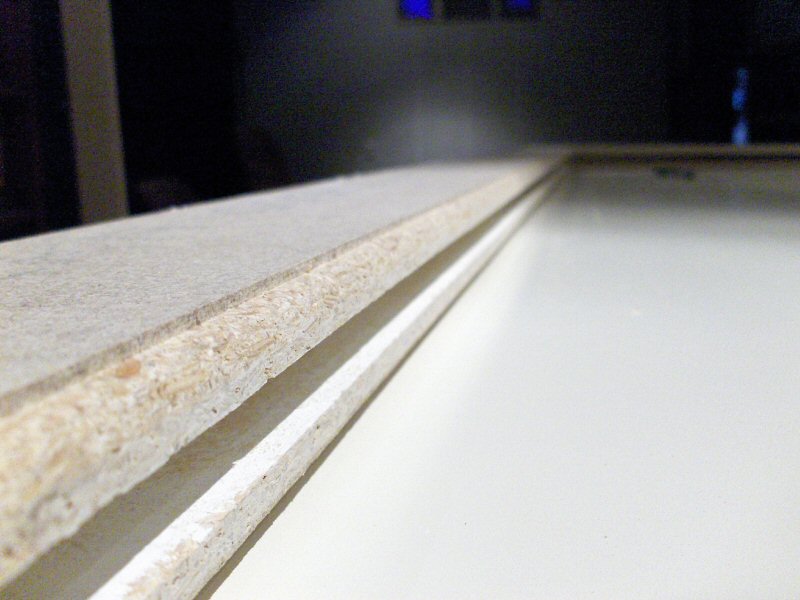
Detail shot of the groove for the glass. I had to put some filler in there to make it smooth since the core of the wood board is less dense. I also used a router to maker a nice finish to the edges around the glass. I hoped the paint would fill enough to make it smooth.... Well, it didn't. I had to use filler on this as well. (no pictures of that either...)
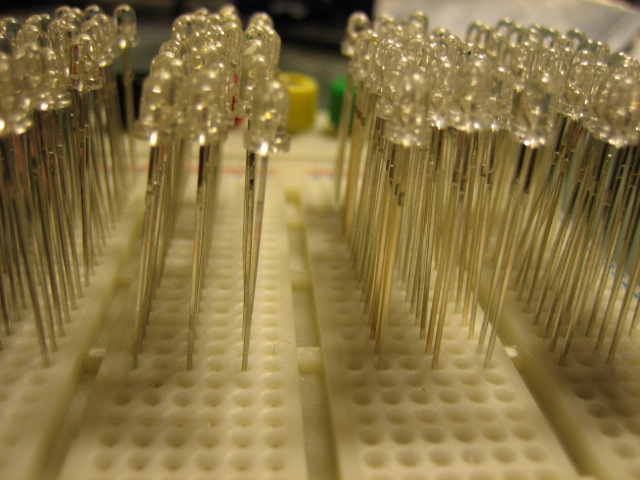
LEDs! 120 of them, to be exact. 60 blue and 60 white. These will light the glass.
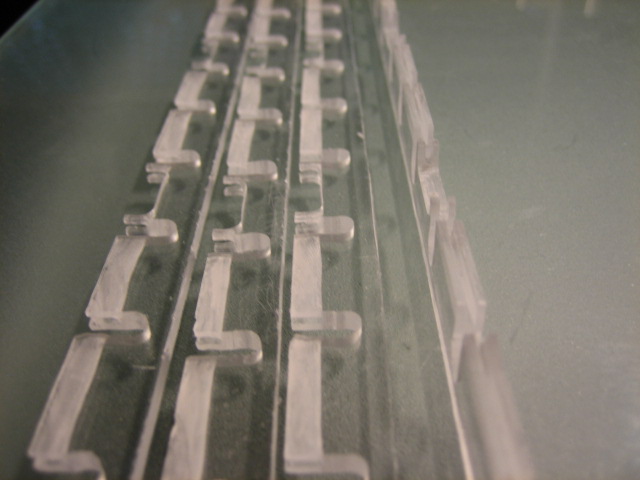
LED holders. They are made from 1 x 62cm strips of 3 mm plexi. I cut out one hole for each led and one hole for each resistor (1 resistor per 3 LEDs.) I Also had to make a groove to fit the cable. This will be at the top and bottom of the glass, the weight of one sheet of plexi will rest on this.
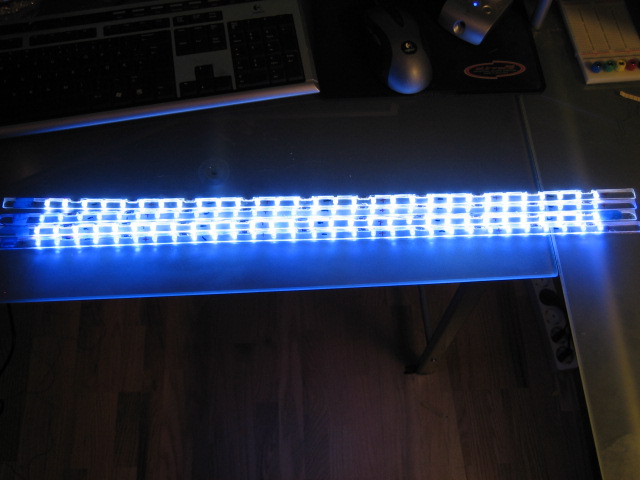
Glowy!
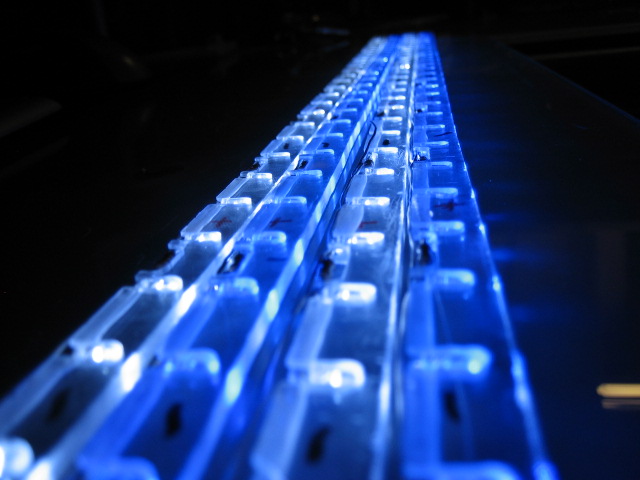
Close-up-art-like-shot of the LED strips. the white ones look a bit blue. (Forgot to adjust the white balance on my camera...)
Here is the first sheet engraved. (Blue)
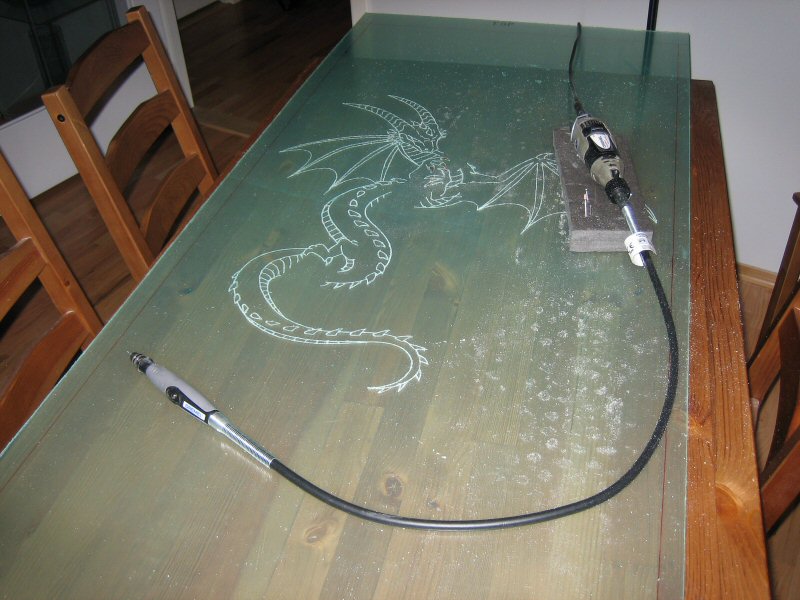
...And the second sheet (White)
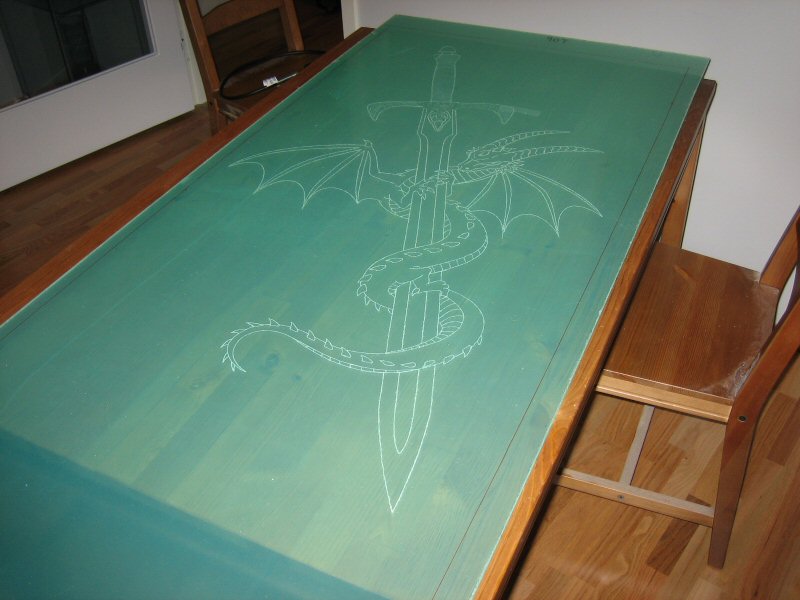
Both sheets together. the sheets are engraved on the opposite sides of each other. In a perfect world i could have engraved the same side of each sheet. however, if i did that the images would look great if they were looked at from straight in front. But if you look at them slightly from the side the images wouldn't match. (the images would be 3mm apart from each other.)
To encounter this the engraved sides are facing each other. The problem is that one image will look a little bit clearer from one side. This turned out to be way less of a problem than i first thought.
There is a pretty bad picture of the initial testing of the lights. All the sheets of glass are now stacked on top of each other. The black edge you see is electrical tape which act ans a spacers/gasket.
The "table" is another door, BTW. (not the original door I'm replacing)

There you can see how the light distributes throughout the glass. the outer glass doesn't conduct any light at all, while the plexiglass conduct the two separate colors. there were less leakage of light than i thought it would be. (The blue is much "cleaner" in reality. my camera just can't pick up the clear blue light of LEDs.)

Here is the sandwich all taped up. (the white tape will ensure a snug fit into the wooden part of the door)
Unfortunately I didn't get the glass as clean as i wanted it to be. If the glass is viewed from an angle some dirt is visible. It's not critical, though.
It turned out to be a bit too snug. I had to put a hole lot of pressure on the glass to get it in. (And enough lube to make a pretty "shady club" feel ashamed) I eventually got it in. if i ever get it out remains to be seen. Hopefully i never have to take it out.
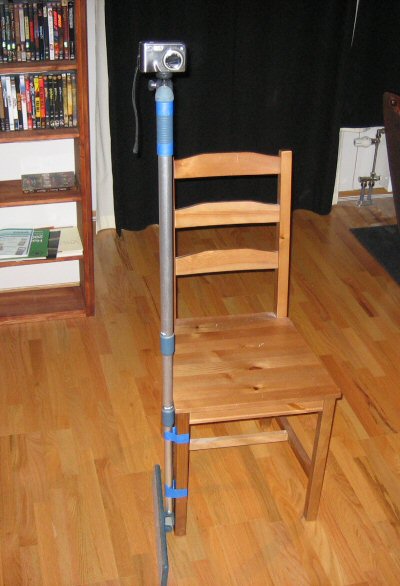
To photograph light a good tripod is needed. I didn't have a good tripod, just a tiny one. So i made my own! It's made from a chair, an adjustable mop shaft and some masking tape. it actually worked great! (well... It's not a tripod. it's more of a petapod)
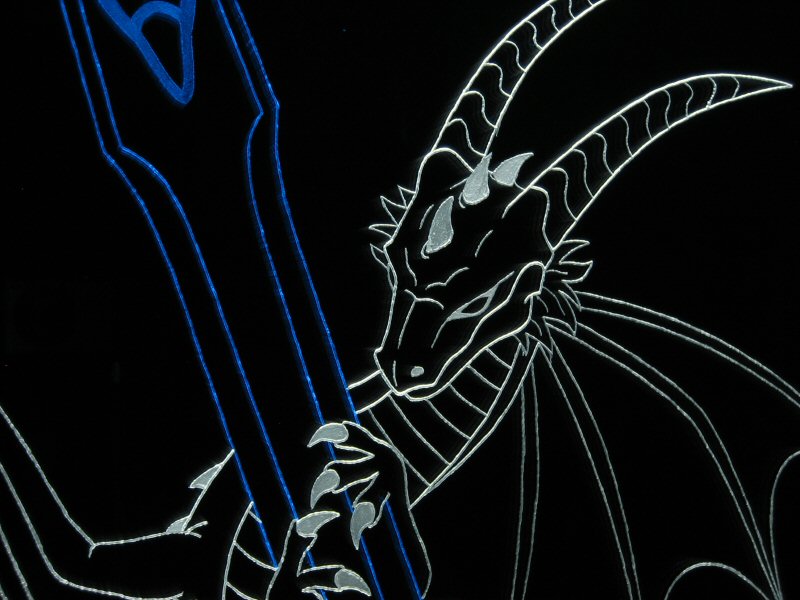
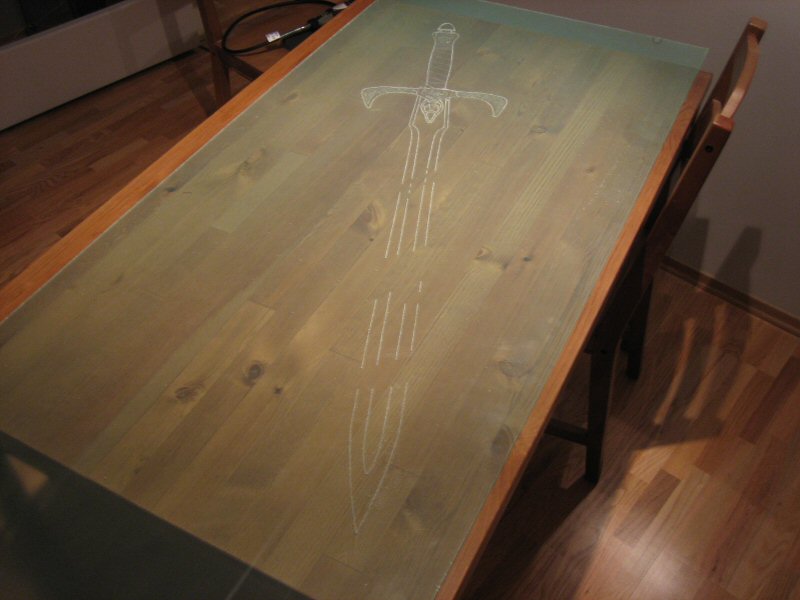
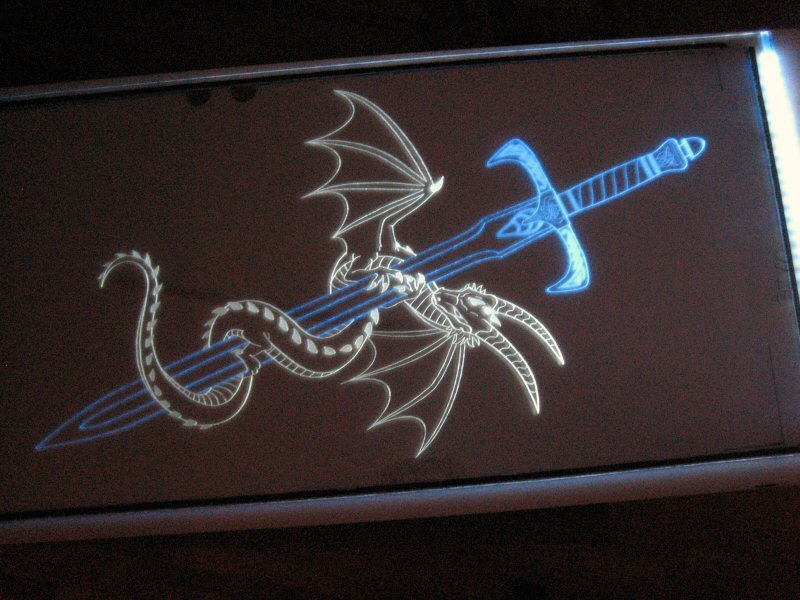
Detail shot of the picture.
And another one. Notice how the blue and white slightly overlap. (the blue looks very uneven. It's a bit better in real life. This is because the white is viewed from the "correct side" while the blue is actually viewed from the "wrong side".)
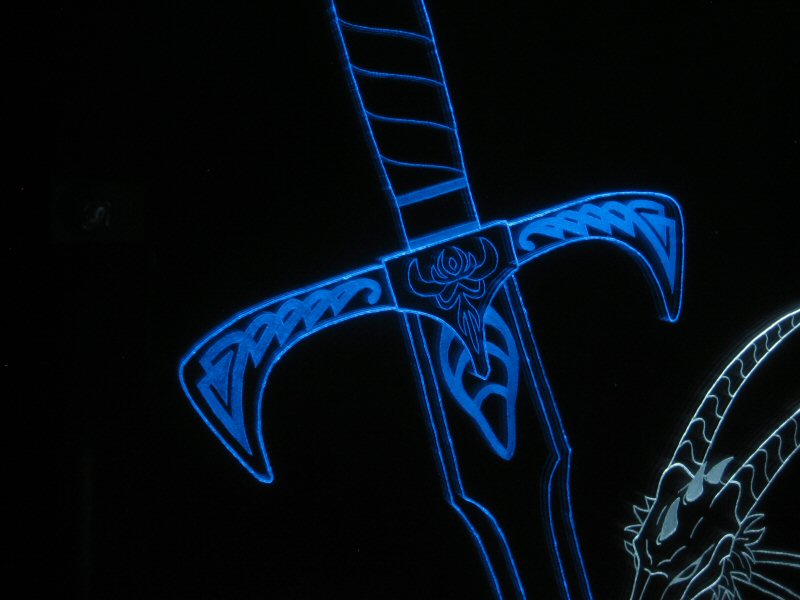
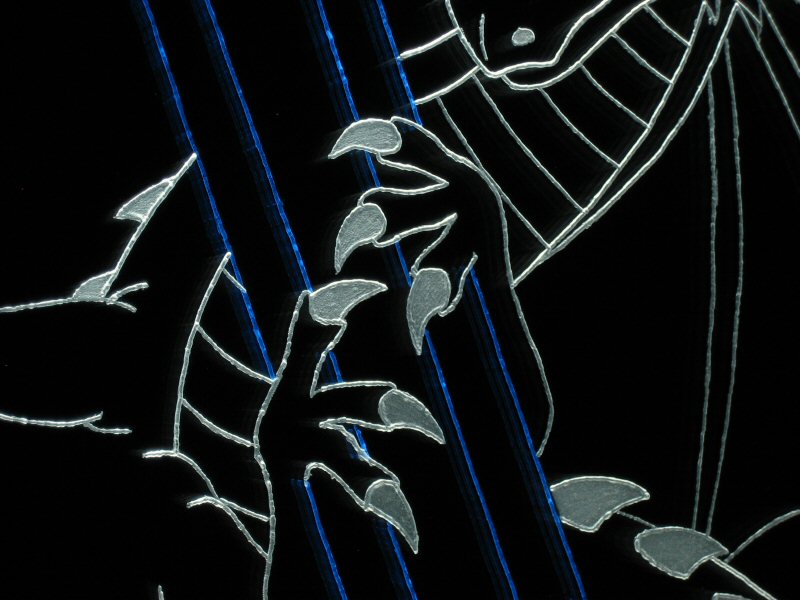
Detail shot of the sword handle.

And here is the final image in darkness. It looks pretty unclear. I had to put sun film on the camera lens to get a half decent shot. I tried several times to get a good one, but my camera doesn't allow me to control it enough manually to get a perfect setting.
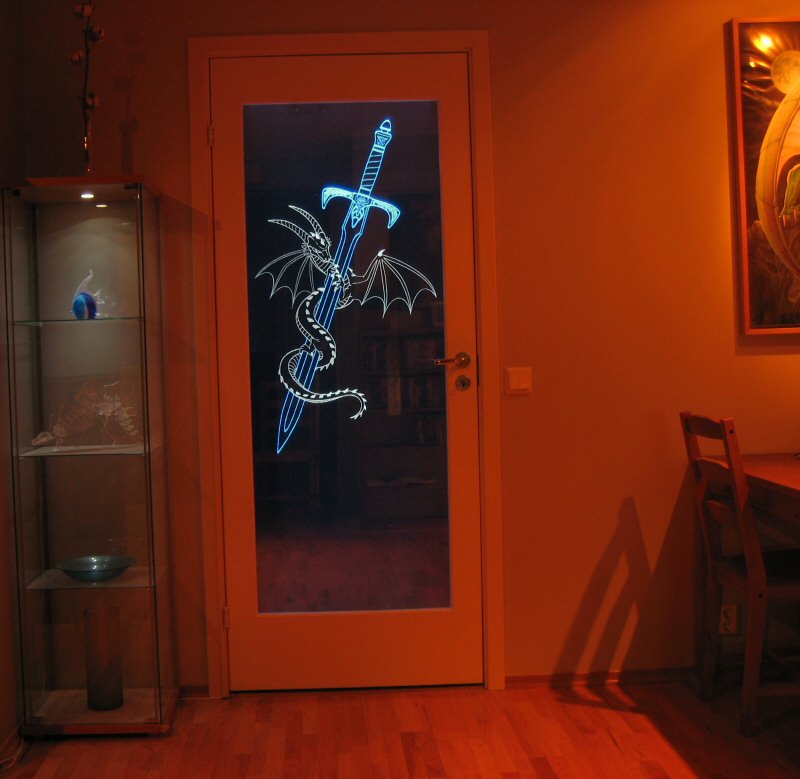
And finally, the door in a illuminated room. (the lights in the hall is off. the glass is completely transparent, but the image doesn't look good at all on photos if the light is on. This is not a problem in real life, though)
It took way more time than I intended it to take. I only had an opportunity to work on it on the weekends. I came up with the idea of making a new door sometime in the summer. But couldn't get started because i had lots of other things to do.
So, that's it. I hope you like it.