Hanzablast
Turn an old telelens and a webcam into a powerfull telescope that is capable of seeing craters on the moon. Next to the webcam and tele lens all you need are some standard pvc plumbing materials (pipes, diameter adapters and endcaps).
Here's what you need:
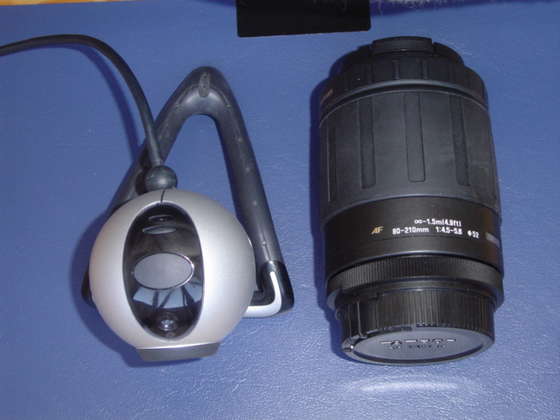
- A webcam (I used a quickcam 4000 from logitech I still had).
- A telelens, the more focal length the more magnification you'll get, the lens I'm using here is 80-210 mm, you can get them at ebay starting from 12 dollars. Many people have old tele lenses left from the analog camera era so there are plenty of them on the web.
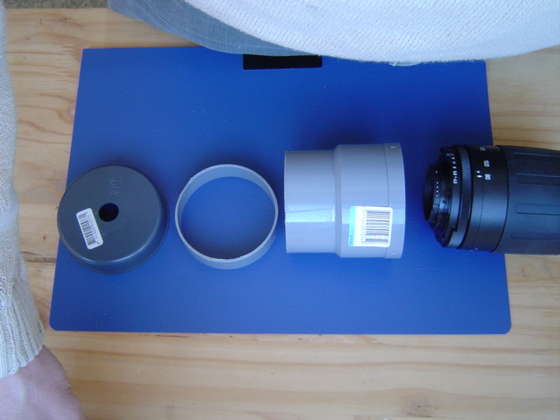
- Some standard pvc plumbing materials: pvc pipes, a diameter adapter to fit different diameters and some end caps. What you need precisely depends on your lens. More details on this can be seen on the next steps.
- It's not part of the telescope itself, but it is important to have a tripod since the magnification is very large so any movement will ge greatly magnified. So without a tripod as a stable base, you won't be able to use your telescope.
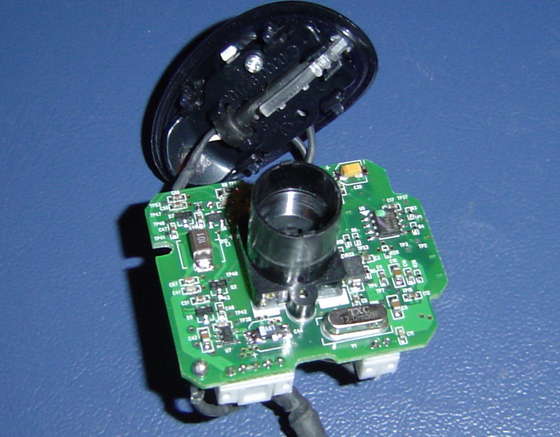
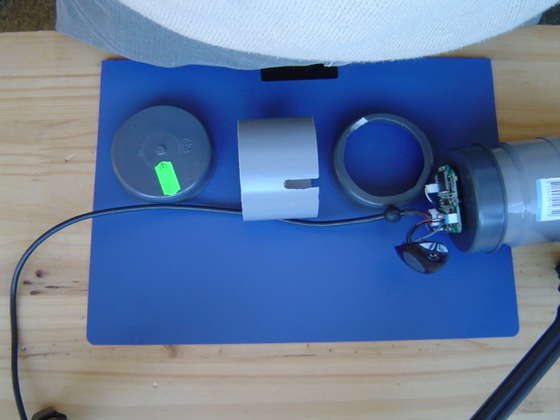
First you need to take the webcam apart until you're left with the pcb and the microphone and button. Unscrew the original lens of the webcam and remove it completely.
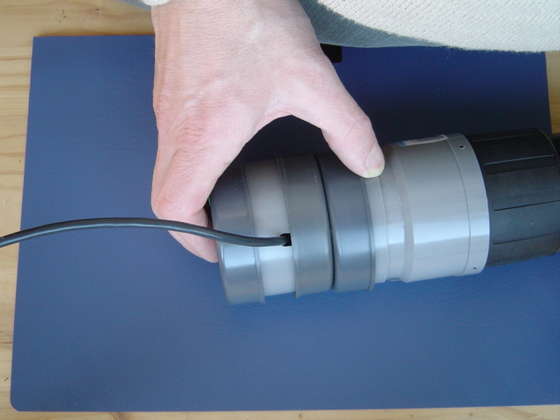
Next you have to go to the local hardware store and find the pvc part that fits your lens or gets very very close to fitting so you can easily fill up the gap with some tightly wound tape. I made 2 of these telescopes and didn't have problems finding a perfect match, but that could just be luck. You'll also need an endcap for this phase.
Make a hole just as large as the optical tube of the webcam exactly in the middle of the endcap. It must be exactly, or performance will reduce. Now you can put everything together. Fit the adapter to the lens, put on the endcap (I needed an extra piece of pipe to reach the endcap diameter) and put the webcam in. The hole in my encap was to tight I could just lock the webcam in. If yours is a little looser, use some tape. The webcam must be about 3 cm behind the rear end of the tele lens.
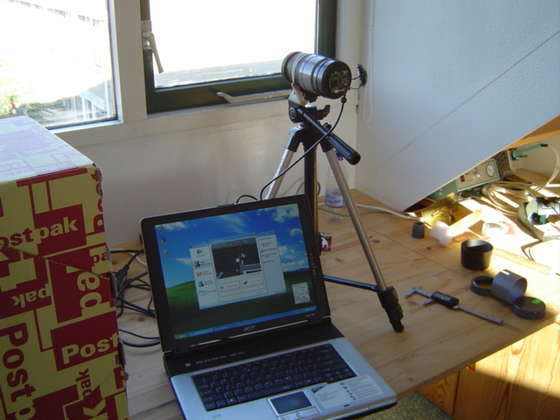
Now you can try it. Hook it up to a pc and put it on a tripod. Aim at something more than 50 meters away and see if you can focus by turning the focus ring of the tele lens. If you can't, then you must play with the distance between the tele lens and the webcam. You may need to change the length of the adapter a bit. Once this is done, you can glue (or tape) everything together. Make sure that all the parts are perfectly aligned in a straight line, this is also vital for the best results.
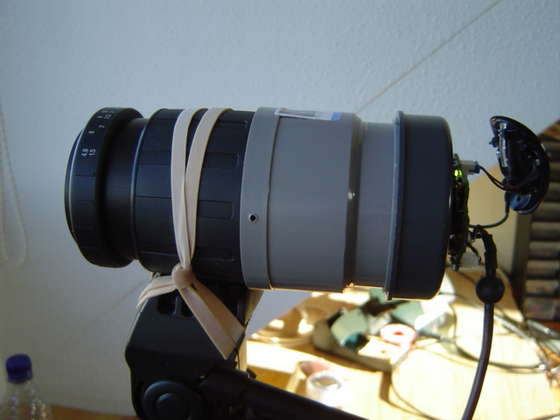
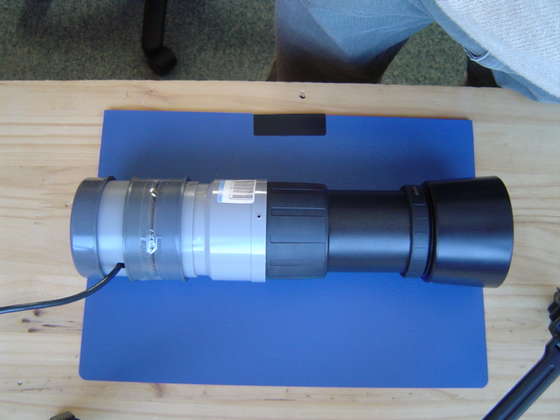
It's very easy to make a housing, just use 2 encaps and a piece of pipe with a slot for the USB wire. It can all be glued or taped together.
On the pictures, you can see the various stages of assembly. One endcap needs quite a big hole, otherwise the parts on the pcb will touch the endcap tilting the webcam pcb which is bad for optical quality.
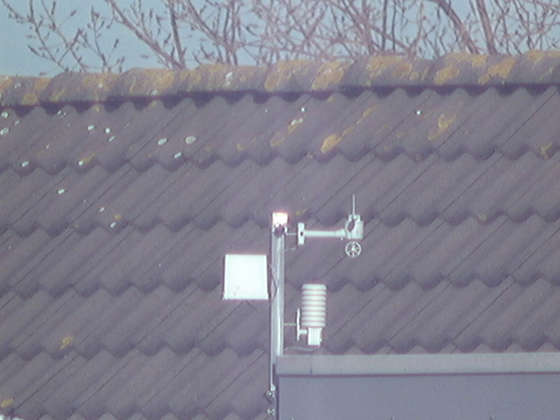
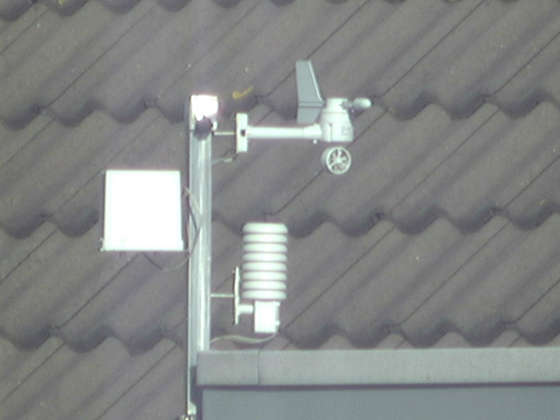
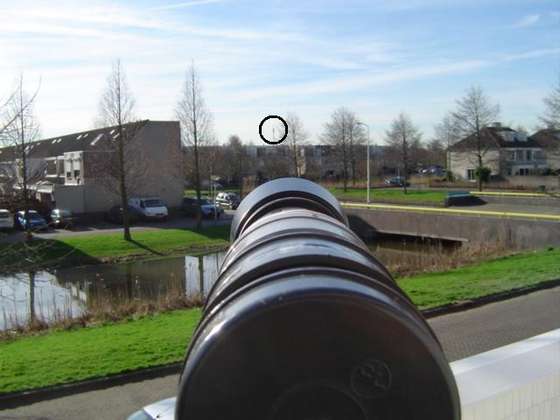
These pictures show the weatherstation on my neighbors house. The first picture is made with my normal photo camera without zooming. The circle shows what the telescope is aimed at. The second and third picture are made with the telescope at 100 mm and 210 mm zoom setting.
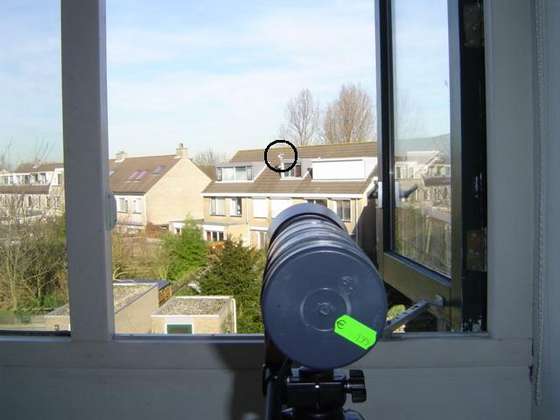
The first picture is made with my normal camera again. The antenna mast is in the circle. It's 450 m away, I checked this with my gps. The second picture is with the telescope at maximum zoom.
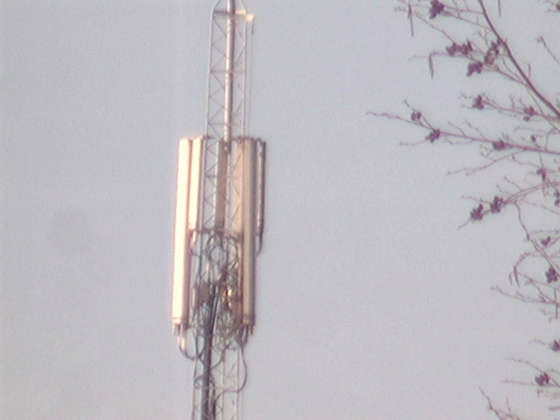
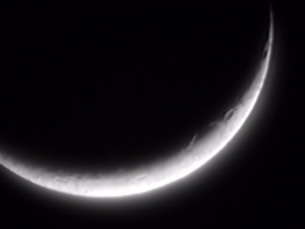
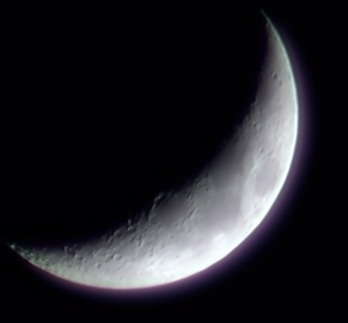
You can easily see craters and mountains.